🎨 Styling and Branding Your Bridges Puzzles
URL: /bridges-puzzle-styling-and-branding
Primary Keyword: Bridges puzzle styling
Secondary Keywords: puzzle branding, custom puzzle design, Puzzle Maker Pro Bridges
🔍 Overview
Your puzzle’s appearance matters just as much as its logic. In this tutorial, you’ll learn how to customize the look and feel of your Bridges puzzles — including fonts, colors, bridge styles, and page layout — so they match your brand, theme, or publication style.
Whether you’re creating clean logic puzzles for printables or themed puzzle books for KDP, styling helps your puzzles look polished, unique, and instantly recognizable.
🧩 Required Modules
- Puzzle Maker Pro – Bridges
Includes all basic styling controls for Bridges puzzle grids and output pages. - Puzzle Maker Pro – Bridges Creator Edition
Adds advanced options like preset themes, custom fonts, line styling, and layout settings — plus commercial rights for branded puzzle books.
🧰 Preparation
Before customizing your puzzles:
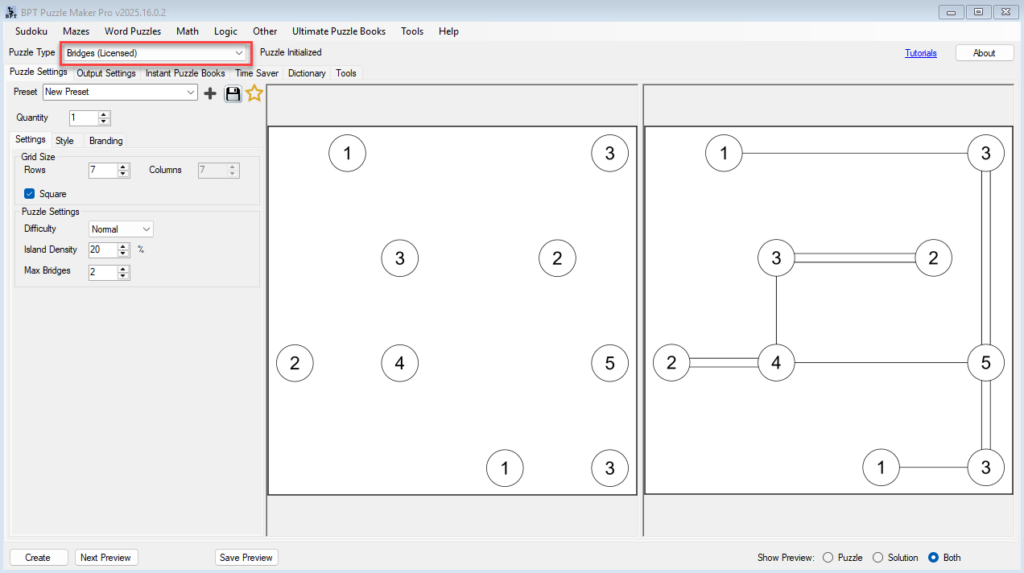
- Open Puzzle Maker Pro and select Bridges from the puzzle dropdown.
- Use the Next Preview button to generate a sample puzzle to style.
- Keep the Preview panel open — you’ll use it to see styling changes live.
- Make sure your output folder is set, so you can easily save styled previews or final puzzles.
🪜 Step-by-Step Instructions
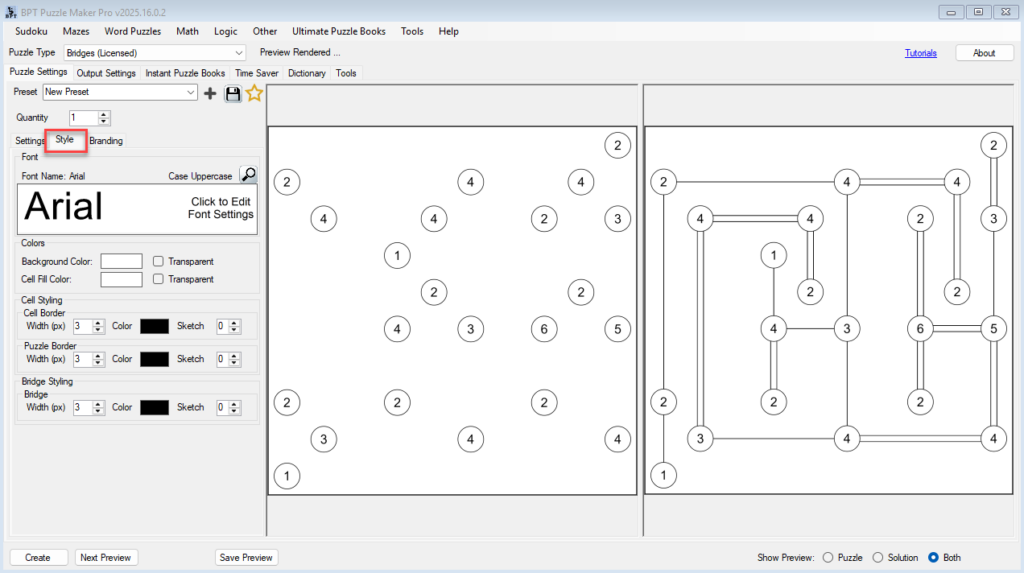
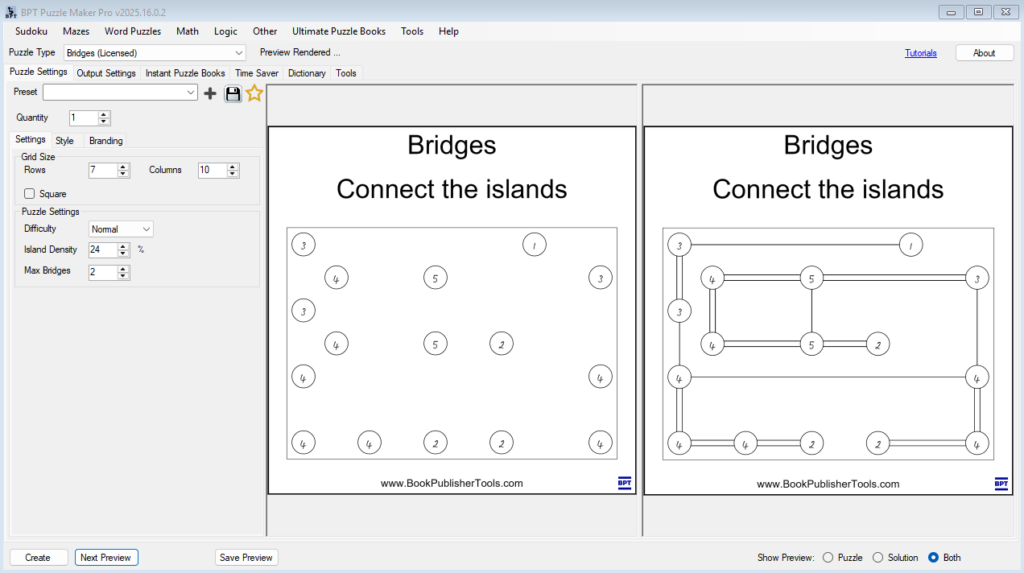
Step 1 – Open the Style Tab
- In the Puzzle Settings area, click on the Style tab.
- Here you can change how the puzzle grid, bridges, and numbers are displayed.
✅ Step 2 – Style Your Bridges and Islands
- In the Style tab, look for the Bridge and Cell styling sections.
- Bridge Lines control how the connections between islands are drawn:
- Choose between Straight or Sketch lines.
- Straight gives a clean, technical appearance.
- Sketch creates a hand-drawn, pencil-style effect that adds warmth or a playful look.
- Adjust line thickness and line color for visibility in print or on screen.
- Choose between Straight or Sketch lines.
- Island Styling – how each island cell looks – uses the Cell styling options:
- Use Cell Fill Color to set the background color of the islands.
- Use Cell Border to define the outline color and thickness.
- Preview your puzzle after each change using Next Preview to see how bridges and islands work together visually.
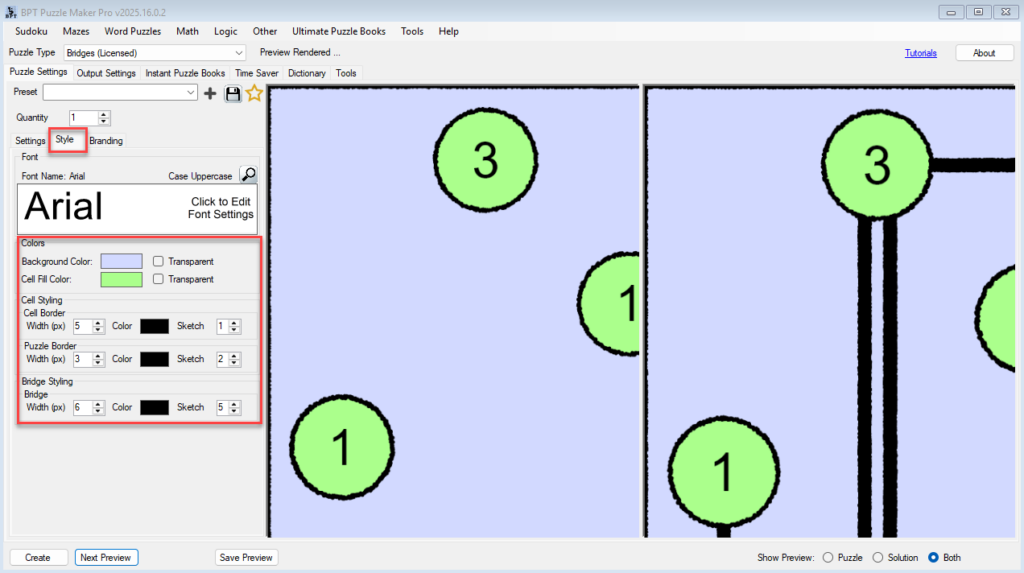
💡 Tip: Combine Sketch lines with soft Cell Fill Colors for a friendly, handcrafted style.
For crisp, professional puzzle books, keep Straight lines and higher-contrast island borders.
Note: You can use the mouse scroll-wheel to zoom in, and left-click to drag the preview images, to check the details.
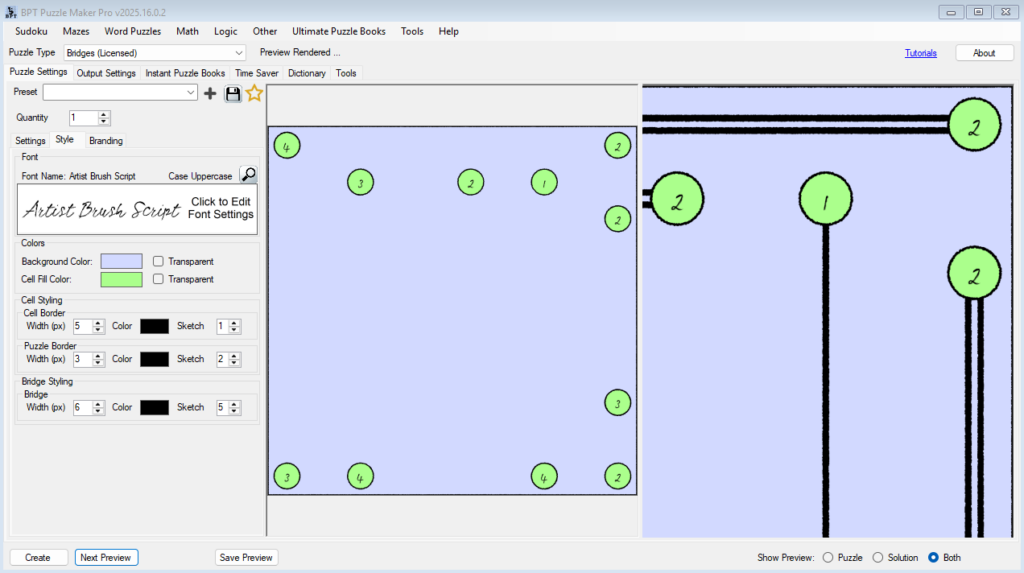
Step 3 – Customize Fonts and Text Appearance
- Choose a font for island numbers and titles.
- Set font size, color, and alignment.
🧠 Example: Use a script font and sketched lines for a handmade appearance.
Step 4 – Add Branding Elements
- Switch on the Branding Options on the Output Settings tab
- Insert your logo or brand mark in the header or footer area.
- Use consistent colors or typefaces across your puzzles to create brand recognition.
- Save your design as a Branding Preset so you can reuse it across all future puzzles.
💡 Pro Tip: Combine branding with difficulty markers (e.g., “Logic Level 1,” “Level 2”) to help readers progress through your book.
Tip: When using Branding for social media images, you can change the puzzle format to a rectangle format for better visual styling.
Step 5 – Preview and Save
- Use Next Preview to test your styling changes.
- Toggle between Puzzle and Solution views — ensure your styling choices look clear on both.
- Click Save Preview to store your preferred layout version.
- When satisfied, click Create to generate the final styled puzzle files.
🎯 Outcome
By the end of this tutorial, you’ll have:
- Designed a fully branded Bridges puzzle that matches your publishing style
- Saved reusable presets for future projects
- Learned how to adjust visual balance for clarity, theme, and professionalism
Your next step: explore creative looks like hand-drawn sketch puzzles or blueprint-style layouts in Tutorial 3.