How to Make Shaped Mazes with Masking in Puzzle Maker Pro
Summary:
Masking fills a shape with a maze instead of a plain rectangle — a heart, an animal, a logo. The quickest way is to hand Puzzle Maker Pro a picture of the shape and let it do the rest. This guide shows that, then how to fine-tune a shape by hand and how to turn a folder of shapes into a whole set of mazes.
Overview
Normally a maze fills a rectangle. Masking lets you fill a shape instead: you tell Puzzle Maker Pro the outline you want, and it generates the maze only inside it. The result is a maze that looks like something — perfect for a themed book.
The key idea is simple: the quickest way needs no drawing at all — you give Puzzle Maker Pro a picture of the shape, and it fills that shape with a maze. (You can also shape one by hand whenever you want to.) Masking works the same way across Puzzle Maker Pro’s newest maze modules, so you learn it once.
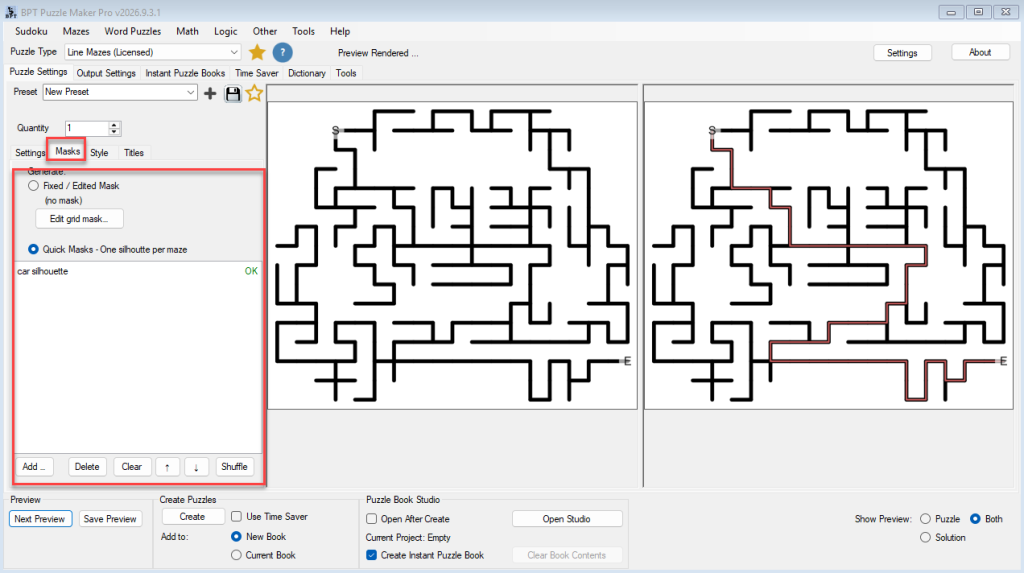
The Quick Way: Start From a Picture
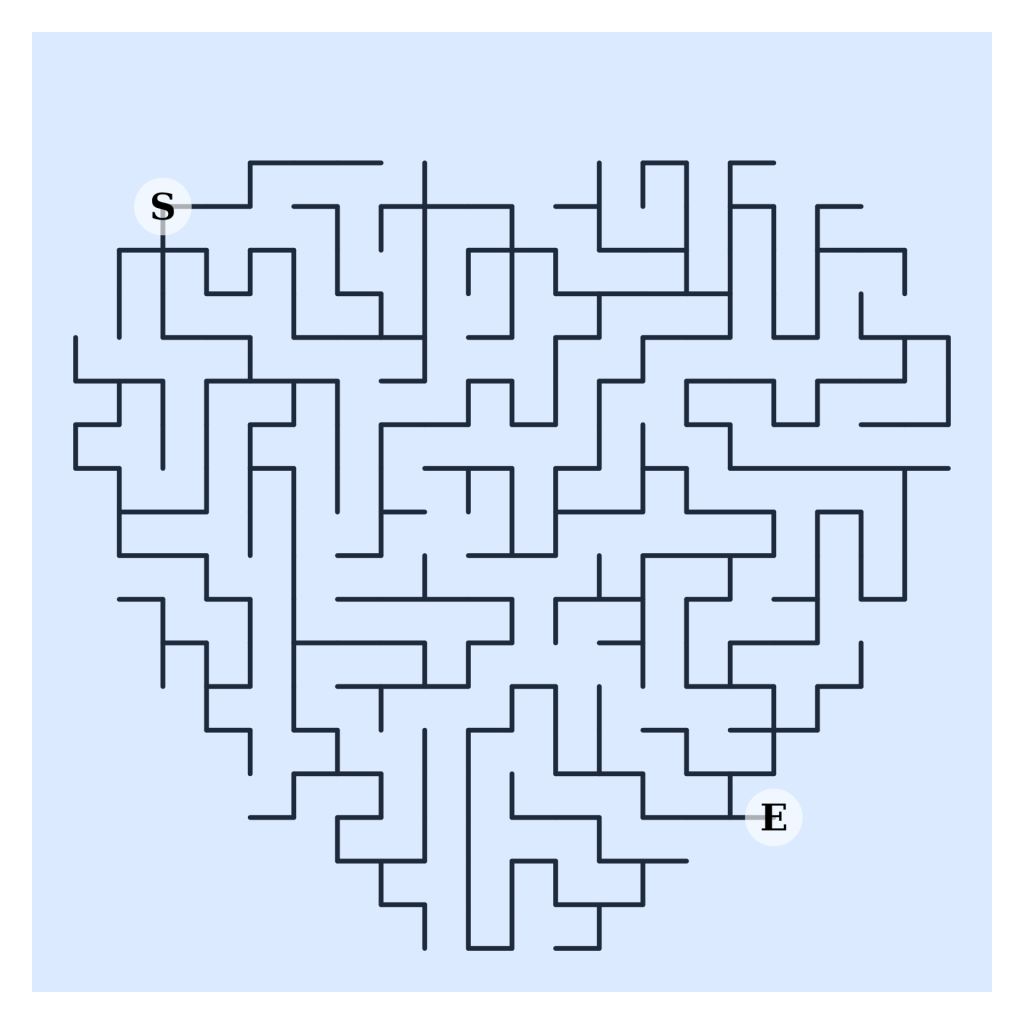
This is all most books ever need. We’ll make a heart-shaped maze as we go.
1. Make or find a shape image. You need a solid, dark shape on a light (or transparent) background — think a filled black heart on white. Puzzle Maker Pro treats a pixel as “part of the shape” when it is dark and opaque, so:
- Fill the shape solid. Outline-only drawings and light-grey fills will not register.
- Keep it one connected blob. Thin necks — a tail, an antenna, the point of a star — can pinch off.
- Keep it bold and simple. Small details disappear once the shape becomes maze cells.
2. Pick your maze shape on the Settings tab. For a heart, choose Squares. (Squares, Triangles, and Hexagons are the grid shapes; Voronoi and Triangulation are the organic ones — picture-tracing works for all of them.)
3. Hand the picture to the maze. Go to the Masks tab. How you give it the picture depends on whether the maze is a grid shape or an organic one:
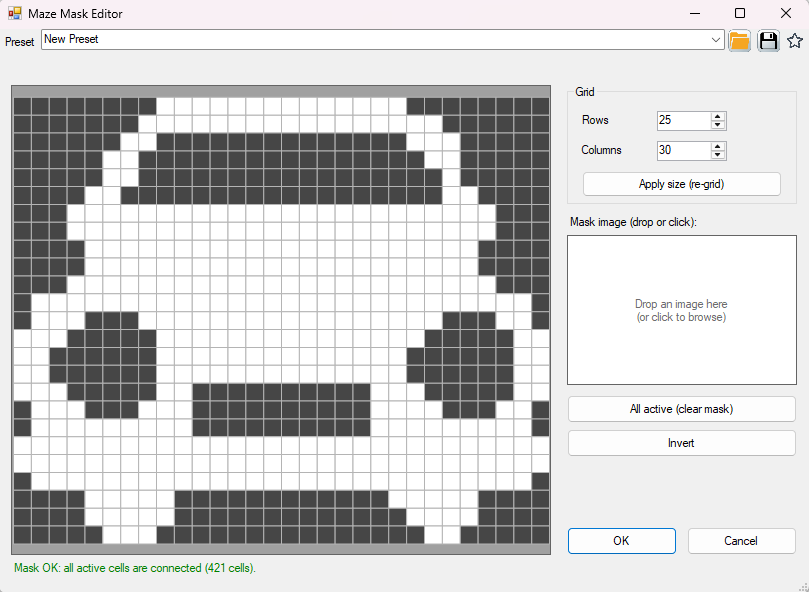
- Grid shapes (Squares / Triangles / Hexagons): click Edit mask to open the Maze Mask Editor, then drop your heart picture onto the “Mask image” panel. The editor traces the heart onto the cells for you.
- Organic shapes (Voronoi / Triangulation): click Choose a silhouette image and pick the file. There is no editor step — the shape is read straight from the picture.
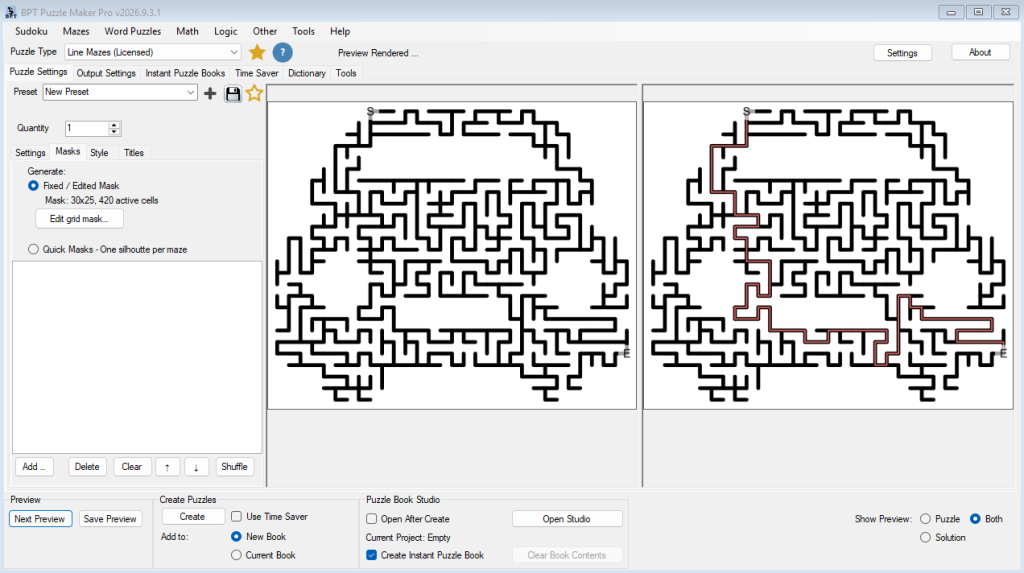
4. Generate. Set the quantity and create the maze. The channels now fill your heart, with the Start and Finish markers on the shape’s edge.
That’s the whole workflow: good picture in, shaped maze out.
Fine-Tune or Build by Hand (optional, grid shapes)
The Maze Mask Editor — the Edit mask button on any grid shape — also lets you shape a maze cell by cell: tidy a shape after tracing a picture, or draw a simple one from scratch without a picture at all.
- The canvas shows the real cells for your shape — actual squares, triangles, or hexagons. White cells are part of the maze; grey cells are masked out.
- Click a cell to toggle it, or click and drag to paint several.
- Watch the status line. Green (“Mask OK… all cells connected”) means your shape is one solid piece and you’ll get exactly what you see. If it turns red, your shape has broken into separate islands — Puzzle Maker Pro keeps the largest piece and drops the rest, so the maze always works, but it’s your cue to reconnect the shape if that’s not what you wanted.
- Quick tools: All active clears the mask back to a full grid; Invert swaps inside and outside; Apply size changes the rows and columns while keeping your rough shape.
- Save shapes you’ll reuse. The preset buttons at the top store a mask in its own library, so a shape you build once is one click away in the next book.
One Shape, or a Whole Set
The single / list choice on the Masks tab decides how a batch is built:
- Single — make many mazes from the one shape you chose (twenty hearts, all different inside).
- List — add several pictures to the batch list and get one maze per picture. Drop a folder of twenty animal silhouettes and you get twenty different shaped mazes in one run; the number of pictures sets the count.

To build the list, drag pictures in from Explorer or use its toolbar: Add Files…, Delete Selected (the list is multi-select), Clear, Shuffle to randomise the order, and ↑ / ↓ to reorder. Each picture is checked as you add it and flagged if it can’t be read or won’t connect, so you spot a bad file before you generate.
Tip: on the Titles tab, the Mask smart title names each maze after its own picture file — so a heart.png becomes “Maze heart” automatically. It’s ideal for a batch where every page is a different shape.
Outcome
You can now fill any geometric maze with a shape — the quick way from a picture, fine-tuned by hand when you want, or a whole folder of shapes turned into a set of mazes in one run. Themed, shaped pages like these are what make a maze book stand out.