Styling and Branding CalcuDoku Puzzles in Puzzle Maker Pro
Overview
A well-designed CalcuDoku puzzle looks professional, clear, and on-brand.
In this tutorial, you’ll learn how to style your puzzles — adjusting lines, fonts, and colors — and apply your branding layout for consistent titles, logos, and descriptions.
We’ll focus on what matters most: creating readable puzzles that match your target audience, whether you’re designing classroom worksheets, puzzle books, or digital downloads.
Requirements
You’ll need:
- Puzzle Maker Pro – CalcuDoku
- Optional: a saved brand layout (from the Output Settings panel)
Step 1 — Select the CalcuDoku module in Puzzle Maker Pro
Start by choosing CalcuDoku from your module list.
You’ll see the familiar interface with puzzle options on the left and a live preview on the right.
The Style and Branding tabs control how your puzzles look — these two areas work hand in hand to define both aesthetics and layout.

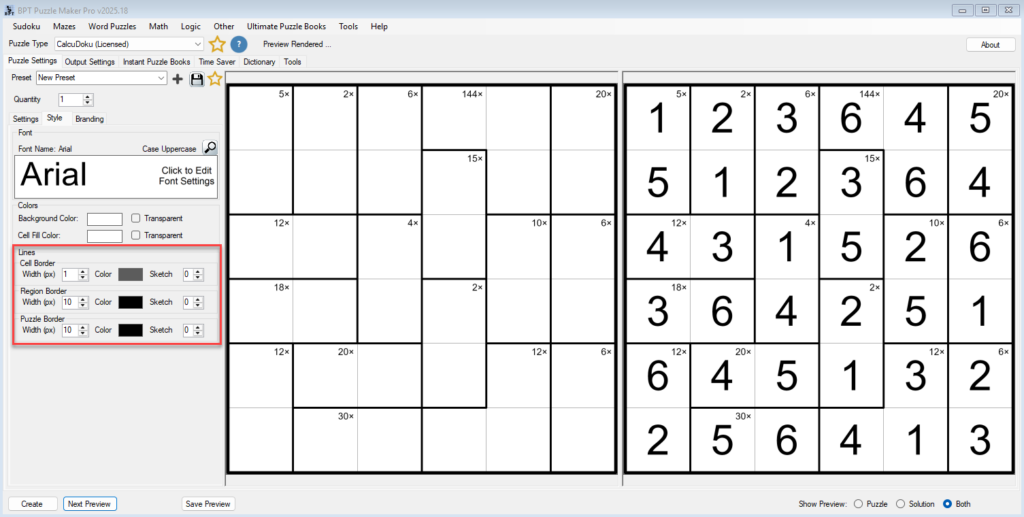
Step 2 — Adjust Line Styles and Borders
Under the Style tab, you can change how cell, cage, and puzzle borders appear.
Try enabling Sketch Lines to simulate a hand-drawn pencil style. This adds warmth and character, especially for educational or printable puzzle books.
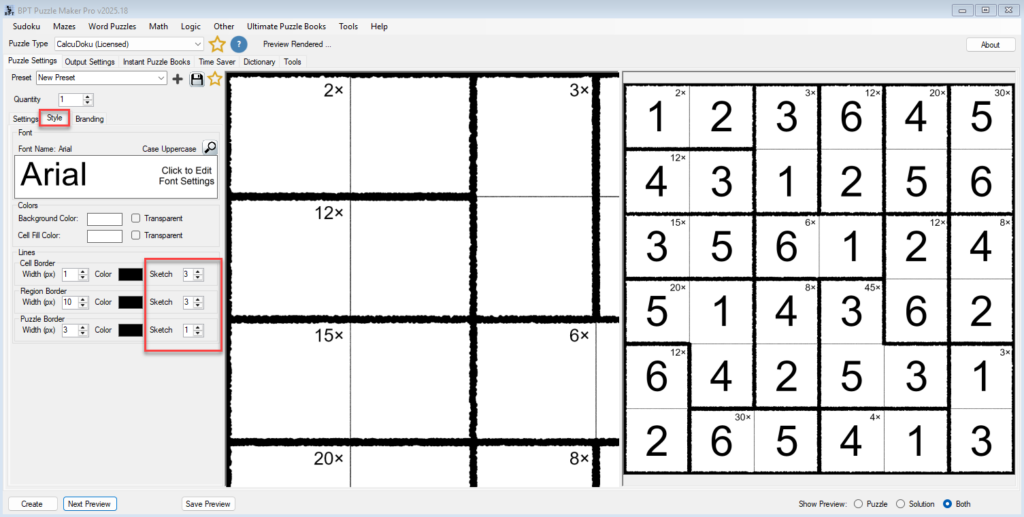
If you prefer a clean, digital look, keep Sketch Lines off and use consistent line weights for a crisp professional appearance.
Check the preview: bold region borders highlight arithmetic cages, while thinner cell lines keep the puzzle visually organized.
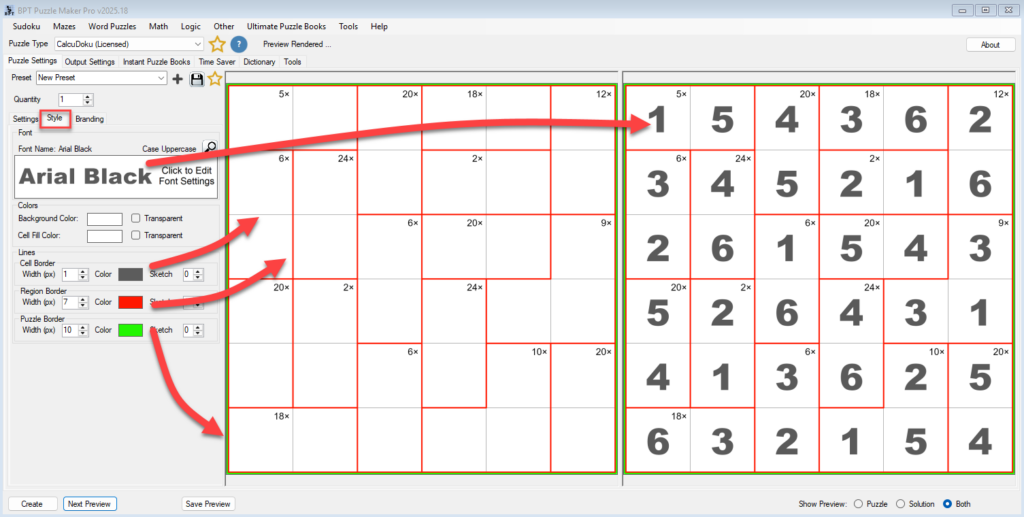
Step 3 — Refine Fonts and Colors
Each puzzle’s readability depends on contrast and spacing.
Click the Font Panel (the box showing the current font name, e.g., “Arial”) to open the full editor.
Choose a clear, modern typeface that fits your audience — bold sans-serif for children’s materials, classic serif for adult puzzle books.
For colors, open the Color Editor, this can be accessed by clicking the small color panel for each item (lines, background/canvas and cell color).
You can set custom colors for numbers, borders, or cage lines.
Keep it simple: high contrast works best, and subtle tones prevent distraction from solving.
If you’re using your own brand palette, apply those colors here for instant consistency across puzzles.
Step 4 — Apply Your Branding Layout
Switch to the Branding tab to connect your puzzle’s content with your saved layout.
This determines what text appears above or below the puzzle (title, difficulty, or description), and how your brand elements are placed.
In the Content Mapping dropdown, choose what you want to display:
- Grid Size – ideal for standardized collections (e.g., “6×6 CalcuDoku”)
- Difficulty – useful for level-based puzzle books or classrooms
- Grid Size + Difficulty – the most common option for puzzle packs
- Custom – for freeform titles, themes, or collection names
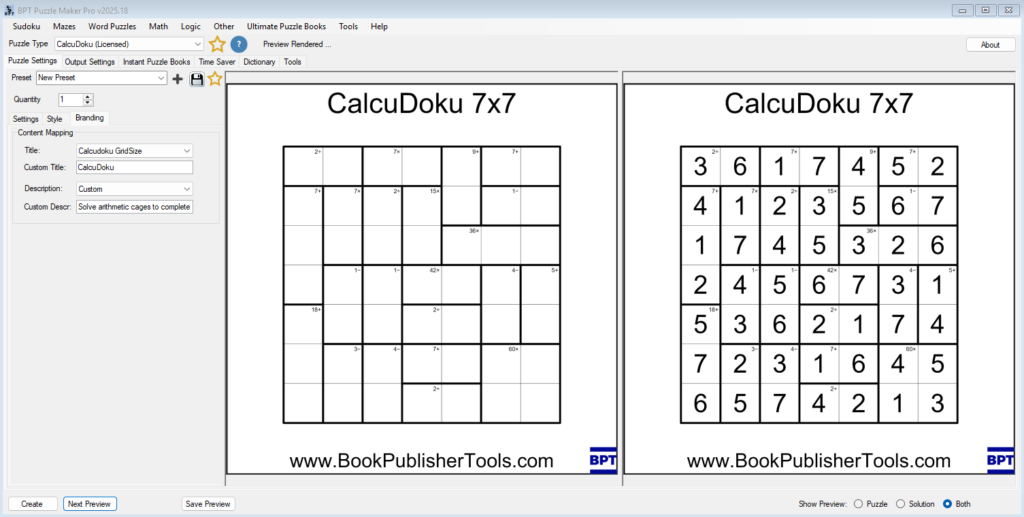
You can also open Output Settings → Set Branding to select a saved layout with your logo, watermark, and title font.
This makes sure your puzzles match the same visual identity as the rest of your brand.
Step 5 — Preview and Fine-Tune
Click Preview Puzzle to see how the title, logo, and puzzle interact.
Check for proper spacing — your brand elements should frame the puzzle, not overlap with cage numbers or operator labels.
If your logo competes visually with the cage targets, reduce opacity or reposition it slightly in the branding layout.
When everything looks right, save the configuration as a Preset.
That way, every new puzzle or batch will automatically use the same styling and branding setup.
Tips
- Sketch lines create a friendly, handmade style perfect for educational or printable puzzles.
- Consistent fonts and colors reinforce brand identity across puzzle types.
- Always test readability: make sure cage numbers and arithmetic signs remain visible in grayscale or print.
- Keep brand logos subtle — aim for complementing the puzzle, not overpowering it.
Outcome
You’ve now styled and branded your CalcuDoku puzzles for consistent visual quality.
Whether you’re producing worksheets for students or full puzzle books for sale, your pages will have a cohesive look that aligns with your brand.
This foundation will save you hours later — once you define your look, you can apply it to hundreds of puzzles automatically through the Instant Puzzle Books and Time Saver workflows.