🧮 Mastering Grid Design and Difficulty Settings in Seek and Find
Overview
In this tutorial, you’ll learn how to design balanced, visually clear Seek and Find puzzles in Puzzle Maker Pro – Seek and Find.
You’ll use the Settings and Advanced tabs to control puzzle size, symbol placement, and difficulty — ensuring your puzzles are fun and perfectly matched to your target audience.
Whether you’re making light educational games or challenging visual hunts, these controls let you set the right balance between playability and complexity.
Required Modules
- Puzzle Maker Pro – Seek and Find
- (Optional) Puzzle Maker Pro – Seek and Find Creator Edition for batch creation or advanced output formats.
Preparation
Before you begin:
- Open Puzzle Maker Pro and select Seek and Find.
- Choose your Symbol Source (letters, numbers, shapes, or images).
- Save your project preset before experimenting — you can easily return to your original setup.
- Set the Preview to show both the Puzzle and Solution while adjusting settings.

Step-by-Step
Step 1: Choose Your Grid Size
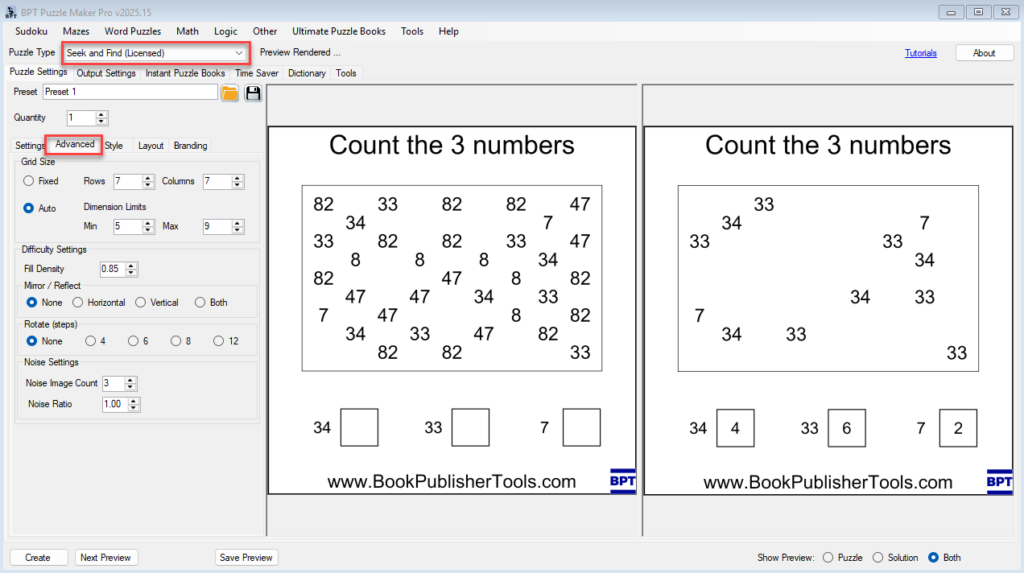
Open the Settings tab and locate Grid Planning.
- Auto Grid Sizing: lets the software choose dimensions automatically — ideal for quick creation.
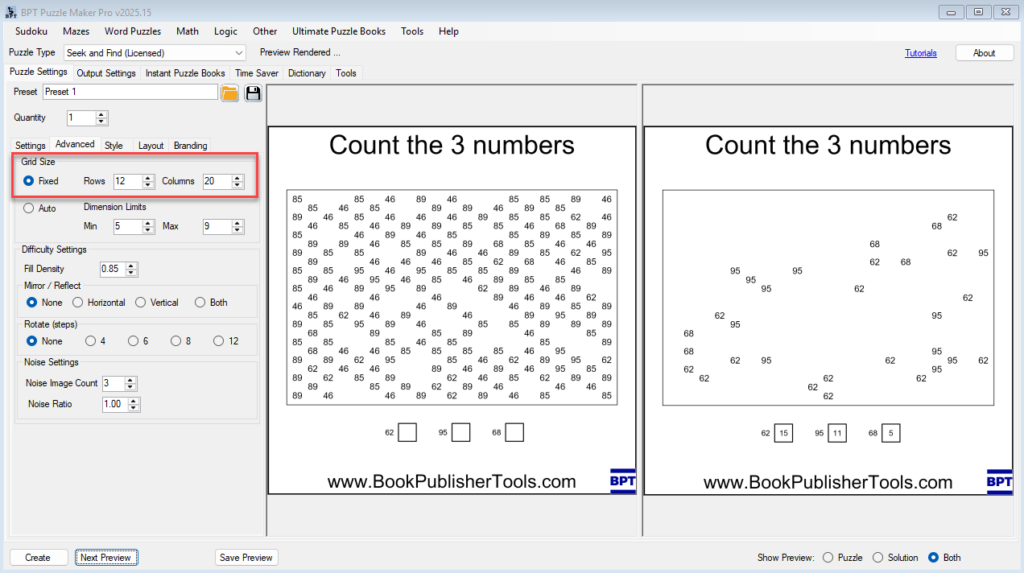
- Manual Grid Sizing: enter your own number of rows and columns.
- Smaller grids (e.g., 10×10) are ideal for young learners or short puzzles.
- Larger grids (20×20 or more) add visual challenge and make puzzles suitable for adults or advanced players.

Note: Using a Fixed Grid Size, will override the ‘Noise Ratio’ setting. First the targets will be placed, and depending on grid size and Fill Density, the remaining spots will be filled with noise
Note: All options in this tutorial will work with numbers, letters, colors and images.
Step 2: Adjust Target Counts
Still in Settings:
- Target Image Count – how many of each symbol appear in the puzzle.
- Range Min / Max – sets the variation shown in the legend (“Find between 3 and 7 apples”).
- Keeping the range moderate helps prevent clutter and ensures each puzzle feels balanced.

Step 3: Control Symbol Distribution
Use Fill Density and Noise Settings to shape puzzle behavior:
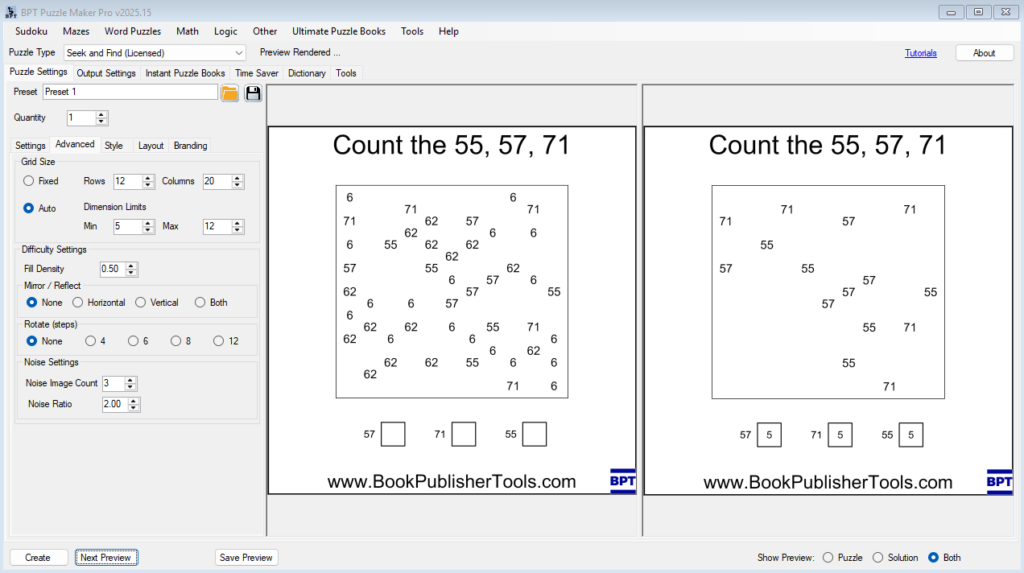
- Fill Density: the percentage of grid cells that contain symbols.
- Lower values (30–50%) create simple puzzles with more empty space.
- Higher values (70–90%) create dense, challenging puzzles.
- Noise-to-Target Ratio: how many decoys appear compared to true targets.
- Example: a 1:3 ratio means one decoy for every three correct symbols.

Step 4: Add Rotation and Mirroring
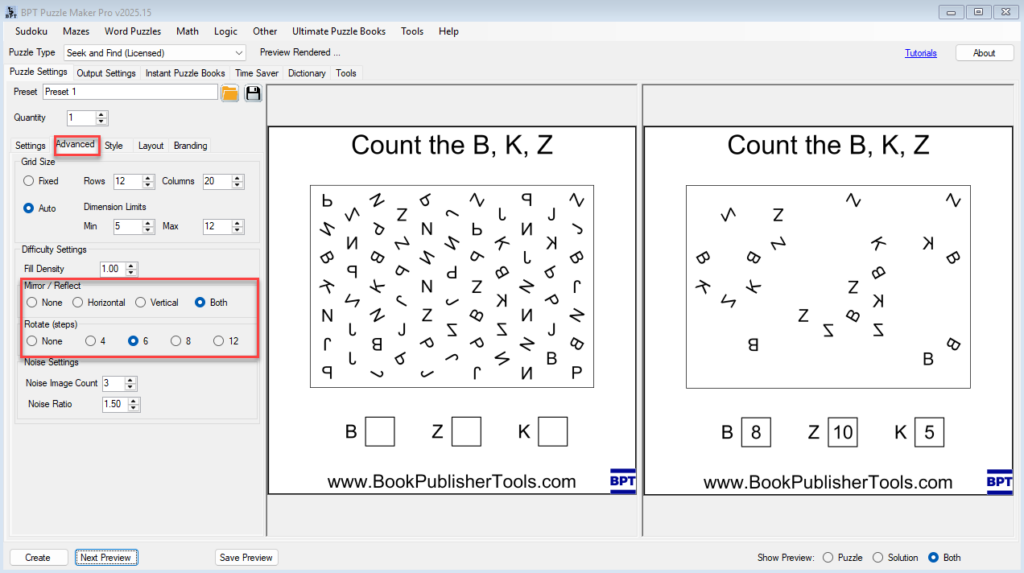
Switch to the Advanced tab for appearance-based difficulty:
- Mirroring: flips symbols horizontally, vertically, or both.
- Rotation: rotate symbols at fixed steps (30°, 45°, 60°, or 90°).
These controls make puzzles harder by introducing subtle variations in orientation.

💡 Tip: Keep rotation simple for educational puzzles. Use both mirroring and rotation for adult-level Seek and Find challenges.
Step 5: Test and Adjust
Click Next Preview to see how your settings affect readability and challenge.
- If the puzzle looks overcrowded, lower the Fill Density.
- If it feels too sparse, increase the Target Count or reduce empty space.
- Keep previewing until the puzzle feels balanced.
Step 6: Save Your Ideal Preset
Once you’ve found settings you like:
- Click the Preset button at the top to save them for reuse.
- Give the preset a clear name, like “Kids 10×10 Animals Easy” or “Adult 20×20 Numbers 1-1000 Hard.”
Presets save all puzzle parameters, making it easy to maintain consistent difficulty across multiple puzzles or books.
Outcome
You now understand how to control puzzle size, density, and difficulty.
With just a few settings, you can produce a wide range of puzzles — from easy classroom activities to visually demanding Seek and Find challenges suitable for books and printables.
