Getting Started with Puzzle Maker Pro – Queens
Overview
The Queens puzzle is a logic-based challenge with rules inspired by chess:
- No two queens can be placed in the same row or column.
- Queens cannot touch each other, even diagonally.
- Each region of the grid must contain exactly one queen.
In Puzzle Maker Pro – Queens, you can create puzzles sized from 5×5 up to 8×8. Puzzles are output as professional print files or interactive formats, ready for publishing on KDP, Etsy, or your own website.
This tutorial will guide you through the basic workflow for creating your first Queens puzzle, including the option to enable transparent regions for KDP print.
Required Modules
- Puzzle Maker Pro – Queens
- Puzzle Maker Pro – Queens Creator Edition (adds commercial license, Time Saver, interactive PDF, HTML output, and advanced book layouts).
Preparation
Before creating your first puzzle, make a few decisions:
- Grid size: Choose between 5×5, 6×6, 7×7, or 8×8.
- Publishing output: Decide if you want individual puzzles (PNG/JPG) or full puzzle books (PDF/PPT).
- Transparent regions: If publishing on Amazon KDP, enabling transparent regions creates a cleaner print layout without heavy grid shading.
Step-by-Step Instructions
1. Select the Queens Module
- Open Puzzle Maker Pro.
- In the Puzzle Type dropdown (top menu bar), select Queens.
- The preview area will display a sample Queens grid.
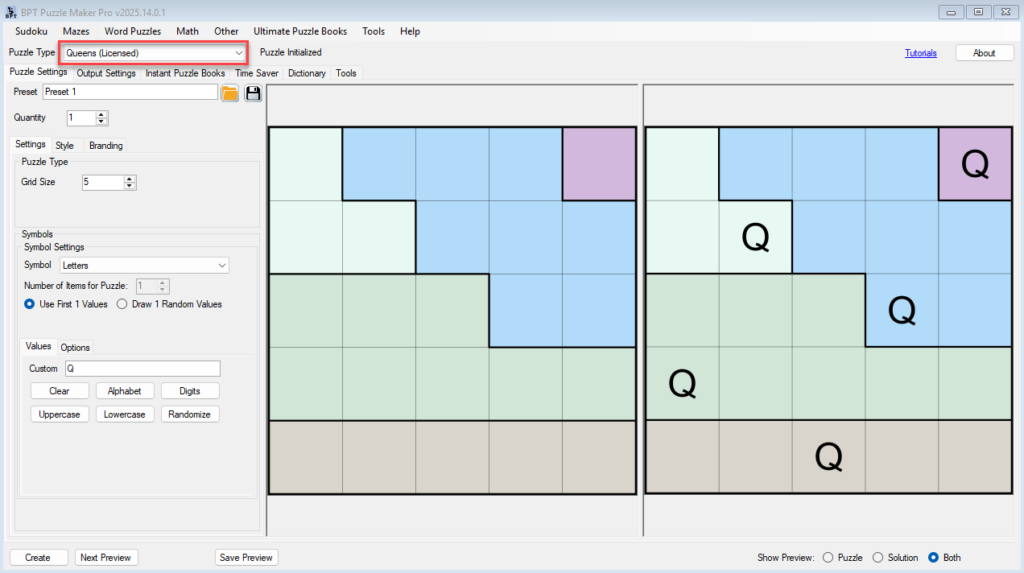
2. Set the Grid Size
- Go to the Puzzle Settings tab.
- Under Grid Size, choose the puzzle dimensions (e.g., 5×5).
- Larger grids (like 8×8) create more complex challenges.
💡 Tip for educators: Start with 5×5 for beginners, then move up for advanced learners.
3. Adjust Region Colors
- In the Style tab, you can set up the region colors.
- Each region must contain exactly one queen.
- Click each color to change it, or click Randomize to set random colors

4. Enable Transparent Regions (Optional)
- In the Styling / Layout section, check the option Transparent Regions.
- This makes regions invisible in the puzzle, leaving only the region borders and the grid lines.
- Ideal for KDP paperback printing, where too many shaded areas can cause gray blocks.
5. Preview Your Puzzle
- Use the Next Preview button to generate a new puzzle example.
- Switch between Puzzle (player view), Solution (with queens shown), or Both in the preview panel.
- Repeat until you’re satisfied with the puzzle layout.
⚡ Note: Queens are never shown in the puzzle itself — only in the solution view.
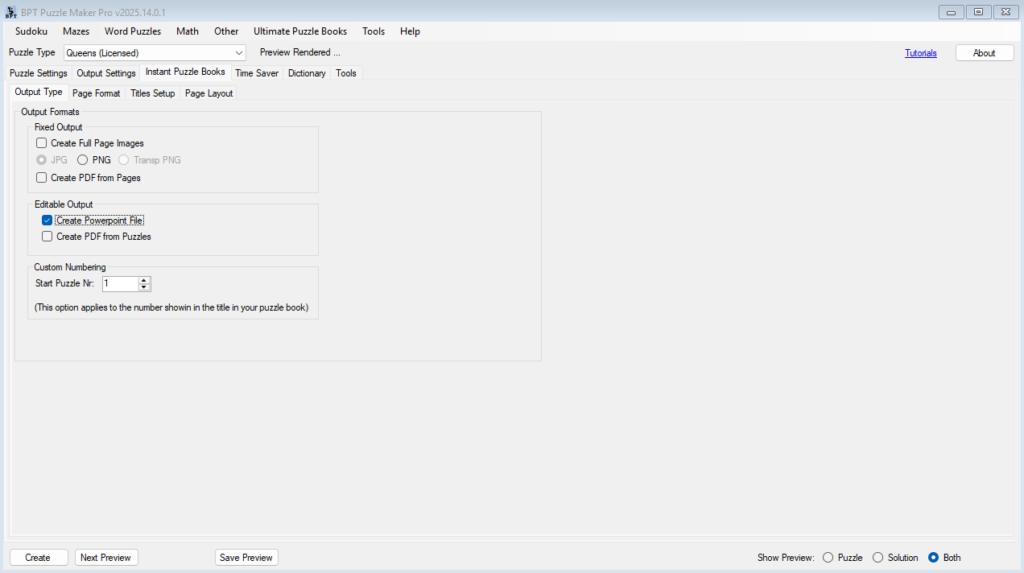
6. Choose Output Format
Go to the Output Settings tab:
- For individual puzzles: choose PNG, JPG, or Transparent PNG.
- For books:
- Select Instant Puzzle Books tab.
- Output to PDF or PowerPoint (PPT).
- Configure trim size, margins, titles, and page layout.

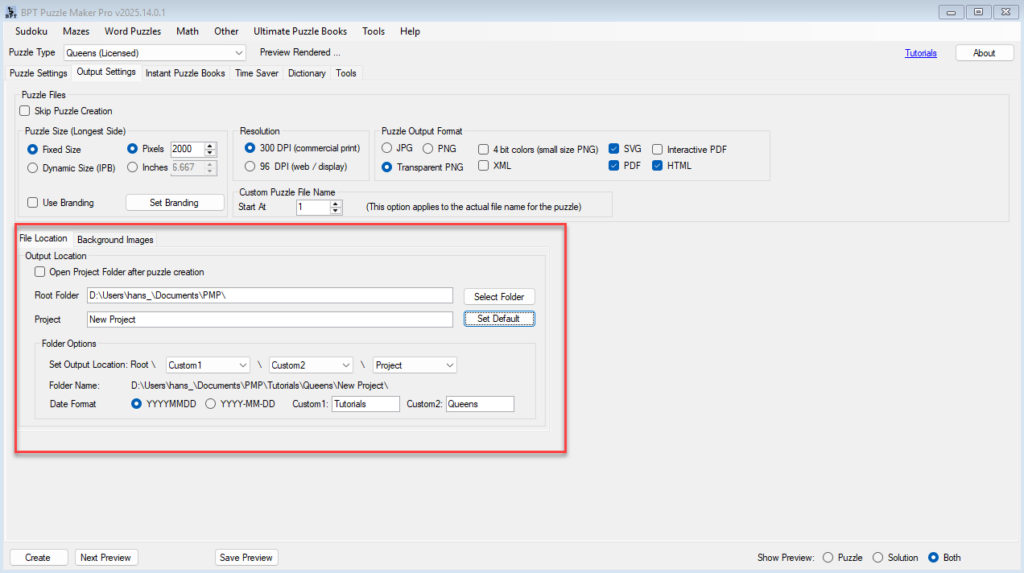
7. Create and Save
- Click Create to generate and save your puzzle(s).
- Files are stored in the output folder you defined in Output Settings.
Outcome
By following this tutorial, you will:
- Create a fully functioning Queens puzzle with all rules applied.
- Use transparent regions for clean KDP print-ready pages.
- Export puzzles individually or as full puzzle books.
You now have your first Queens puzzle ready for publishing!
Further Reading
- Styling and Branding Queens Puzzles
- Time Saver for Queens Puzzles (Creator Edition)
- Interactive Puzzles (HTML & PDF, Creator Edition)