🧩 Getting Started with Tents and Trees
Create your first custom puzzle with ease — and export it for print or digital use.
🗂️ Required Module
- ✅ Puzzle Maker Pro – Tents and Trees
- ✅ Puzzle Maker Pro v2025.13.0.1 or later is required
🛠️ Preparation
Before you start, make sure:
- You’ve installed Puzzle Maker Pro v2025.13.0.1 or later
- You’ve unlocked the Tents and Trees module
- You’ve chosen:
- Grid Size (5 to 10)
- Difficulty (Easy or Hard)
- Output folder for your files
🔢 Step-by-Step Instructions
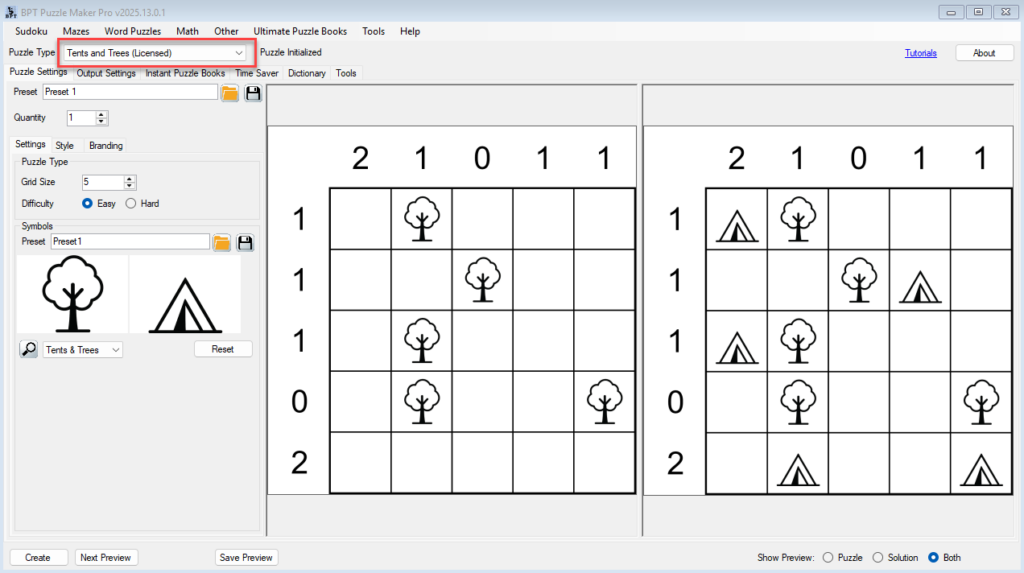
1. Select the Module
- Open Puzzle Maker Pro.
- From the top-left dropdown, choose:
Puzzle Type → Tents and Trees (Licensed)

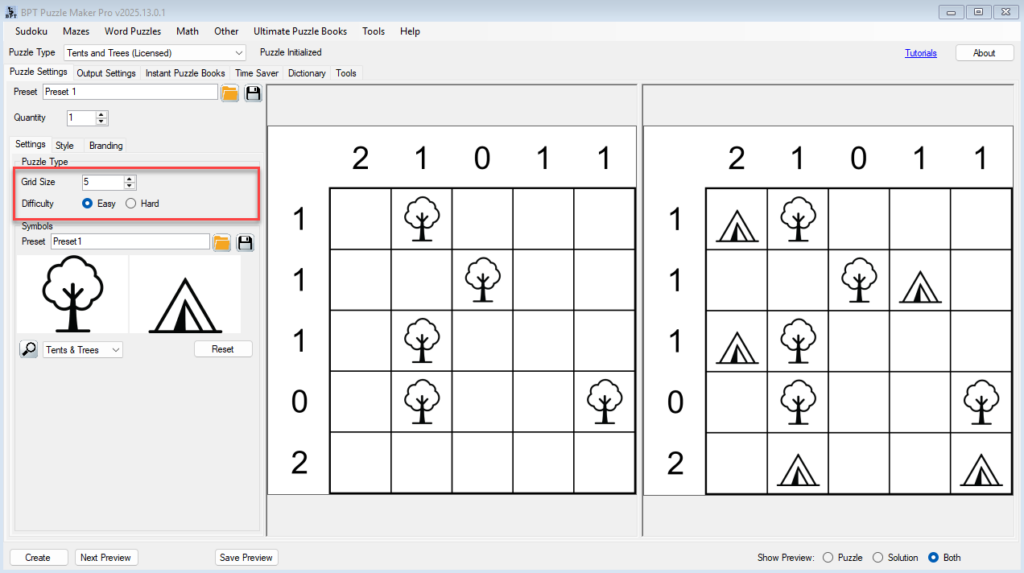
2. Configure Puzzle Settings
Go to the Puzzle Settings tab and choose:
- Grid Size (e.g. 5 for small, 10 for challenge)
- Difficulty: Easy or Hard
- (Optional) Pick a symbol preset or custom image pair
➤ Learn how in Theming Your Puzzle - Click Next Preview to view the puzzle and solution

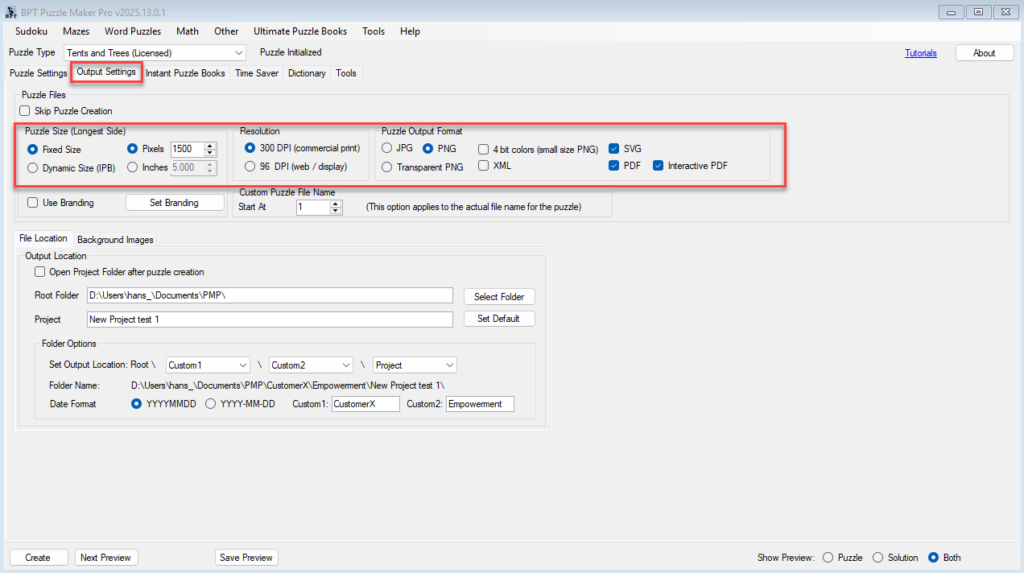
3. Choose Output Format
Navigate to the Output Settings tab:
- Set Resolution (300 DPI for print, 96 for digital)
- Choose output formats:
- ✅ PNG or JPG for images
- ✅ PDF or SVG for vector print
- ✅ Interactive PDF (only in Creator Edition)
- Set Fixed Size (pixels) or use Dynamic Size (IPB) for book layout workflows

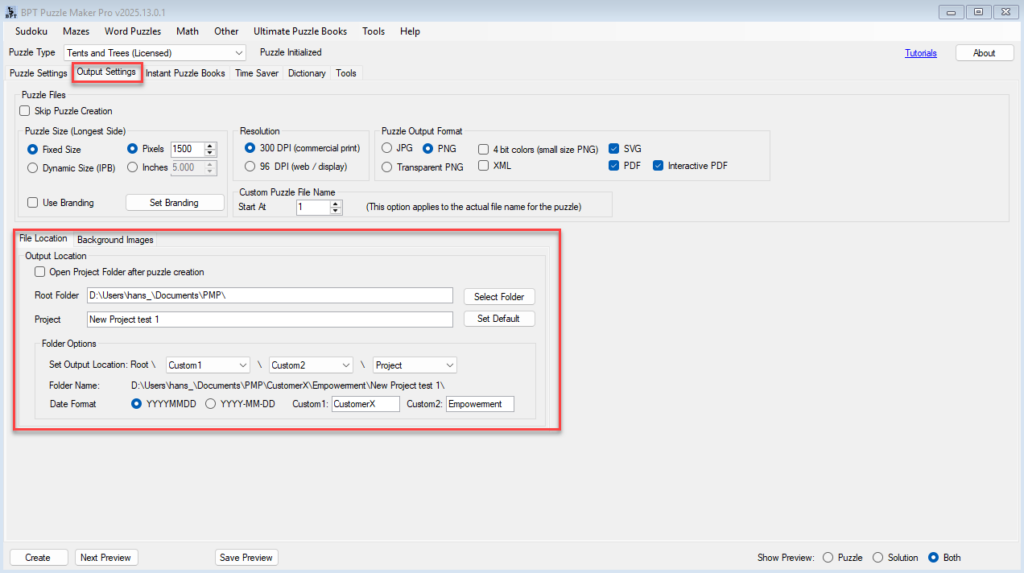
4. Set File Output Location
Still on the Output Settings tab:
- Set your Root Folder and Project Name
- Use
Custom1/Custom2tags for organizing files (e.g., by client or theme) - (Optional) Enable “Open project folder after puzzle creation”

5. Preview and Save
- Use Next Preview to review your puzzle and solution
(Use the toggle at the bottom right: Puzzle / Solution / Both) - Click Save Preview to save the current preview version
- When ready, click Create to generate your final files
🎉 Outcome
You’ve created your first Tents and Trees logic puzzle, previewed it, and exported it in one or more formats (PNG, PDF, SVG, etc). Your puzzle is now ready to print, publish, or include in an activity book.
