⚙️ Batch Maze Creation with Time Saver – Custom Rows, Presets, and Layouts
Generate multiple types of pipe mazes in one session using presets and advanced control
📦 Required Modules
🛠️ Preparation
Before you begin:
- Use Puzzle Maker Pro v2025.10 or later
- Open the Pipe Mazes module
- Make sure the Time Saver tab is visible (only included with the Creators Bundle)
✅ Important: First, create and save a few custom presets in the Pipe Mazes module. These will be used in the Time Saver grid.

🧩 Step-by-Step: Use Time Saver to Batch Create Multiple Maze Types
1. Create and Save Your Presets (REQUIRED FIRST STEP)
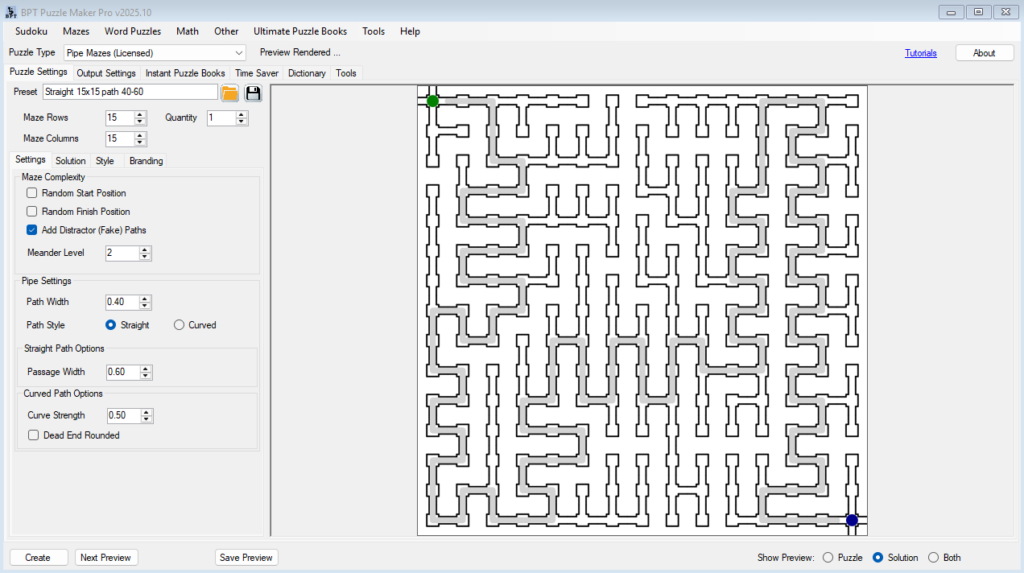
- Configure your desired pipe maze settings: grid size, curve, fake paths, path width, etc.
- Go to the Tools menu or preset dropdown
- Click Save Preset
- Name your preset descriptively (e.g.,
Curved Easy 10x10,Boxy Medium 20x20)
These presets will now appear in the Time Saver interface.
2. Open the Time Saver Tab
- In the Pipe Mazes interface, switch to the Time Saver tab
- You’ll see an empty instruction table where each row controls a batch of puzzles
3. Add Instructions Using Rows
Click Add Row to begin. Each row becomes a batch instruction:
You can either:
- Use the current default settings from the main interface
OR - Load settings from one of your saved presets (recommended)
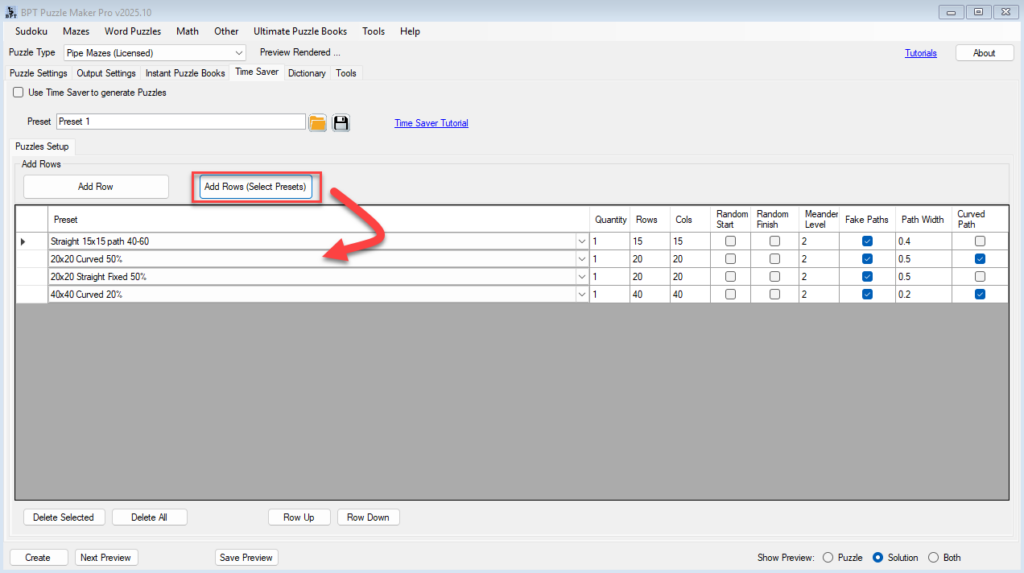
Each row includes the following editable fields:
| Field | Purpose |
|---|---|
| Preset | Load grid size, path width, curve, meander, fake paths, etc. |
| Quantity | Number of puzzles to generate in that batch |
| Rows / Columns | Override the grid size |
| Random Start / Finish | Toggle for automatic maze entry/exit points |
| Meander Level | Controls how winding the path is |
| Fake Paths | Adds visual complexity |
| Path Width | Sets the pipe thickness |
| Curved Path | Check to enable curved style (uncheck = straight) |
You can edit any field directly. Fields not edited will inherit the values from the selected preset.
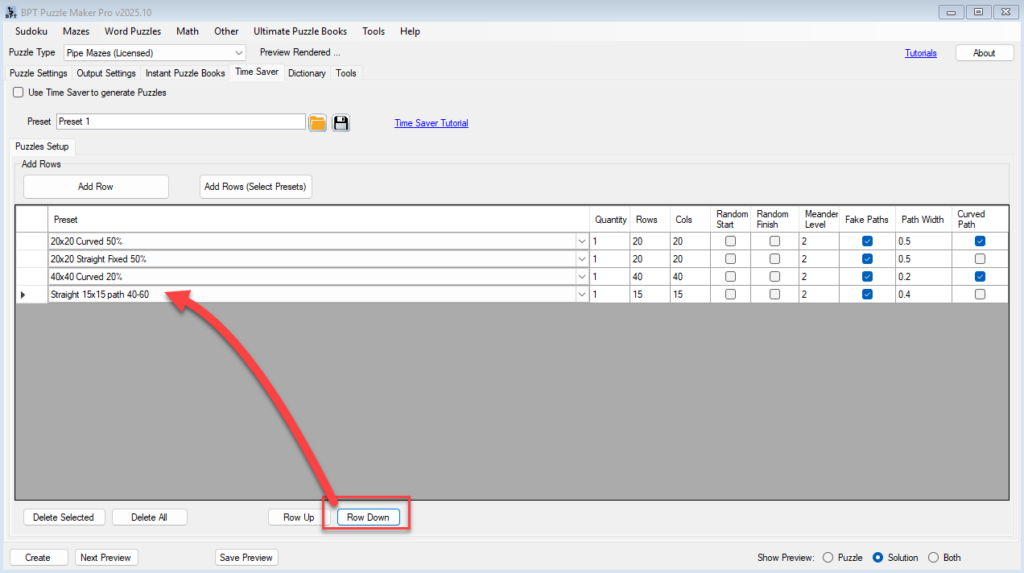
4. Organize the Instruction Table
Use the available row controls:
- 🗑 Delete Row: Remove selected batch
- 🔁 Clear All: Reset the table
- ⬆⬇ Move Up / Down: Reorder rows to control generation sequence
💡 Tip: Organize your instructions so similar layouts export together — useful when combining into a book.

5. Set Output Format
- Switch to Output Settings tab
- Choose your export format: PDF (book), PNG, JPG, or SVG
- Optional: Use Instant Puzzle Books to define trim size, margins, and layout
6. Click “Create (TS)”
Once your instruction table is filled:
- Click Create (TS) to run the full batch
- Puzzle Maker Pro will:
- Apply each row’s settings
- Generate the specified number of puzzles per row
- Apply any Instant Puzzle Book settings (if enabled)
📂 Output will be saved automatically in your chosen folder, sorted by your layout preferences.
🎉 Outcome
You’ve just used Time Saver to:
- Run multiple batch instructions in one click
- Mix and match styles, grid sizes, path types, and difficulty levels
- Output all puzzles — optionally formatted into a full puzzle book
Ideal for:
- Publishing diverse KDP puzzle books
- Creating PLR bundles with multiple difficulty levels
- Batch-producing client deliverables for Fiverr or agencies