🖨️ Exporting and Refining Seek and Find Puzzles for Print and PDF
Overview
This tutorial shows how to export high-quality Seek and Find puzzles and solutions using Puzzle Maker Pro – Seek and Find.
You’ll learn how to preview, fine-tune clarity, and generate clean output files that are ready for printing, classroom worksheets, or puzzle books.
Every puzzle automatically produces two files for each output format — one for the puzzle and one for its matching solution — ensuring professional, ready-to-use results every time.
Required Modules
- Puzzle Maker Pro – Seek and Find
- (Optional) Puzzle Maker Pro – Seek and Find Creator Edition for batch creation or advanced layouts.
Preparation
Before exporting:
- Create or open a puzzle preset and generate a preview.
- Verify symbol visibility and legend readability — exports will look exactly like the preview.
- Confirm your Output Folder and preferred Output Format in the Output Settings tab.
- Make sure you’ve saved any style or branding changes before generating the final files.
Step-by-Step
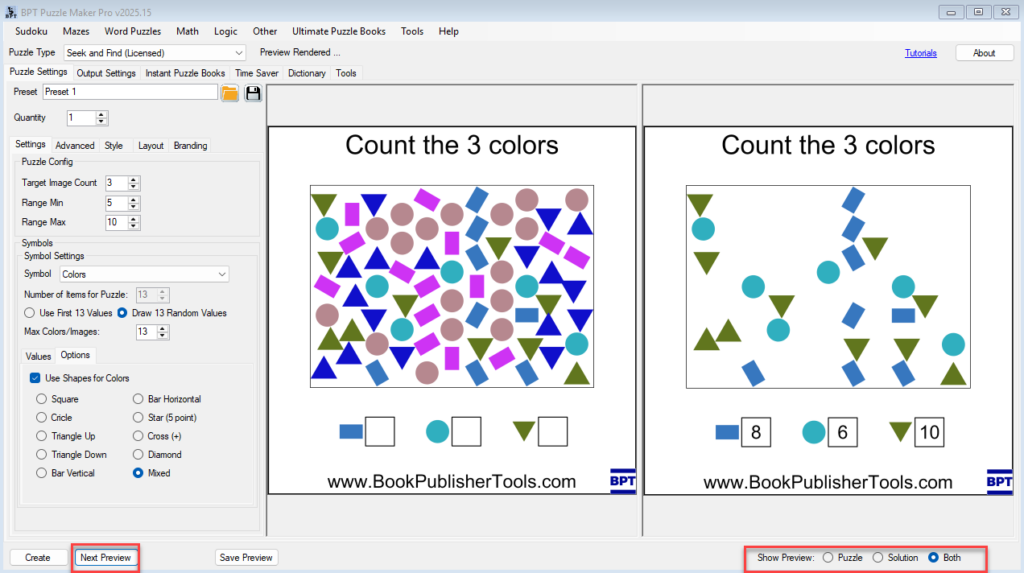
Step 1: Check Puzzle and Solution Previews
- Use the Preview selector above the puzzle view to switch between:
- Puzzle – shows the version your users will see.
- Solution – displays all target symbols clearly marked.
- Both – allows side-by-side comparison inside the preview window.
- Review each mode to confirm the puzzle looks balanced and the legend matches your chosen targets.
Step 2: Adjust for Clarity
To ensure good print quality:
- Reduce Fill Density slightly if symbols overlap or appear crowded.
- Increase Line Distance or Padding in the Layout tab to make shapes clearer.
- For image-based puzzles, adjust Symbol Scaling in the Style tab to prevent images from touching.
💡 Tip: For puzzles using small or detailed images (e.g., animals), test both color and grayscale previews to check readability before exporting.
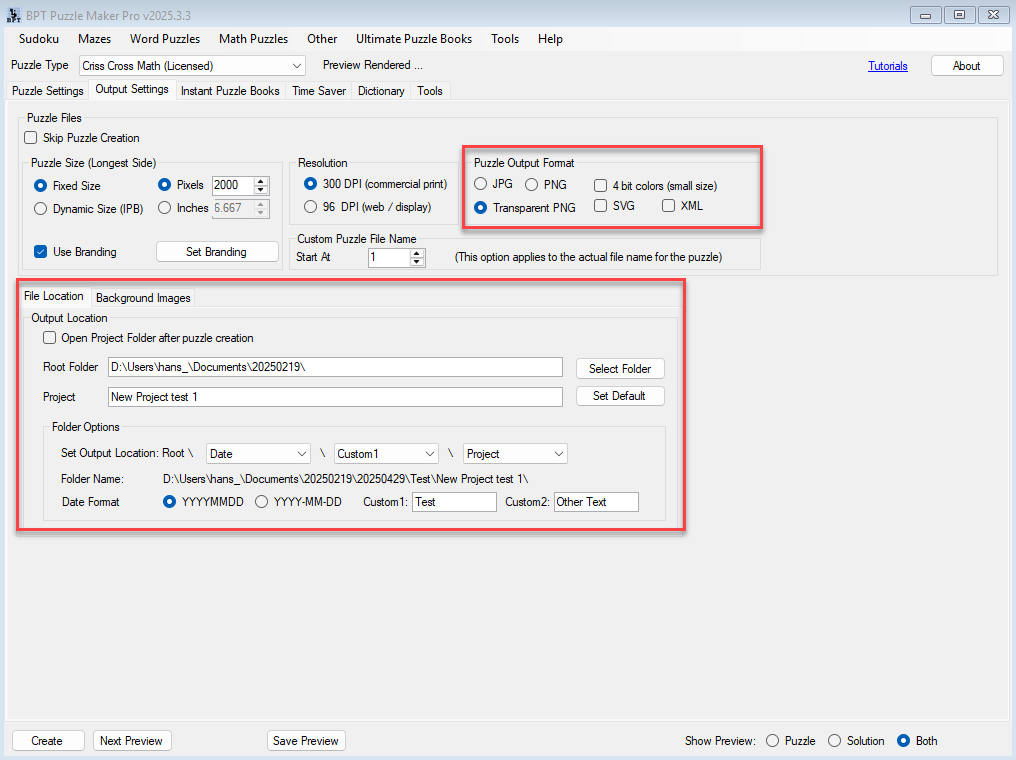
Step 3: Choose Your Output Format
In the Output Settings tab:
- Select your preferred format:
- JPG – versatile for worksheets and online use.
- PNG – preserves transparency if you want to layer puzzles into templates.
- PDF – best for printables
- Choose your Resolution (usually 300 DPI for print quality).
- Confirm your output folder and file naming options.
Note: When you use Instant Puzzle Books, you can use either PNG or JPG output – these files will be used to assemble the puzzle books
Step 4: Generate Your Files
Click Create to export your puzzle.
The program automatically saves:
- Project/
Puzzles/[puzzle name]_P.jpg/pdf/png - Project/
Solutions/[puzzle name]_S.jpg/pdf/png
Both files appear in your designated output folders, ready for publishing or printing.
Step 5: Verify Results
Open the exported files to confirm:
- The legend displays correctly (symbols and counts are clear).
- The solution highlights all target symbols.
- Borders, spacing, and watermark (if used) appear as expected.
If something looks off, return to the Style or Layout tabs, adjust spacing or symbol size, and recreate the puzzle.
[Screenshot Placeholder: Example of final puzzle and matching solution]
Outcome
You’ve successfully exported professional Seek and Find puzzles and solutions, ready for print or digital publication.
You now know how to ensure clarity, spacing, and format compatibility — the essentials for producing polished, consistent puzzles every time.