🧩 Overview
A well-designed puzzle isn’t just about logic — it’s about layout. In Picture Math, small visual adjustments can make a big difference in readability, especially for younger solvers or print-focused books. This tutorial walks you through how to use the Crop Images setting, Picture Padding, and the Style tab’s spacing controls to give your puzzles breathing room and a polished, professional appearance.
Perfect for anyone publishing on KDP, creating activity books for kids, or simply looking to elevate the visual appeal of their puzzles.
📦 Required Modules
- Puzzle Maker Pro – Picture Math
✅ Preparation
- Install Puzzle Maker Pro – Picture Math v2.2025.3.2.2 or later.
- Load a puzzle with 2 or 3 symbols for preview.
- Have either default or custom images ready.
🛠 Step-by-Step: Adjusting Cropping, Padding, and Spacing
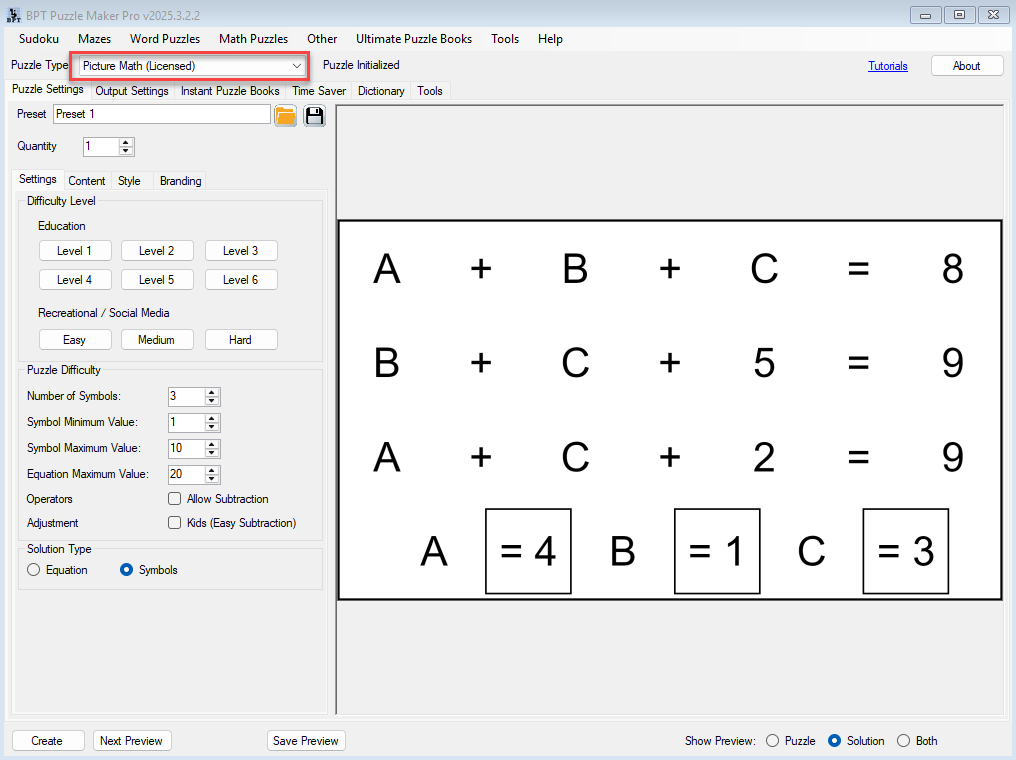
1. Open the Style Tab
- With your puzzle module loaded, go to the Style tab.
2. Use Crop Images (Optional)
- Check the Crop Images box to remove extra white space around your pictures.
- This is useful if your original images are square but have empty margins (like whitespace at the bottom).
✂️ Tip: Cropping trims to the visible content. Leave unchecked if you prefer full-size square layout consistency.


3. Set Picture Padding
- This setting adds spacing around each individual image (e.g., around the symbols replacing A, B, or C).
- Increase padding if your images feel too tight or need more breathing room.

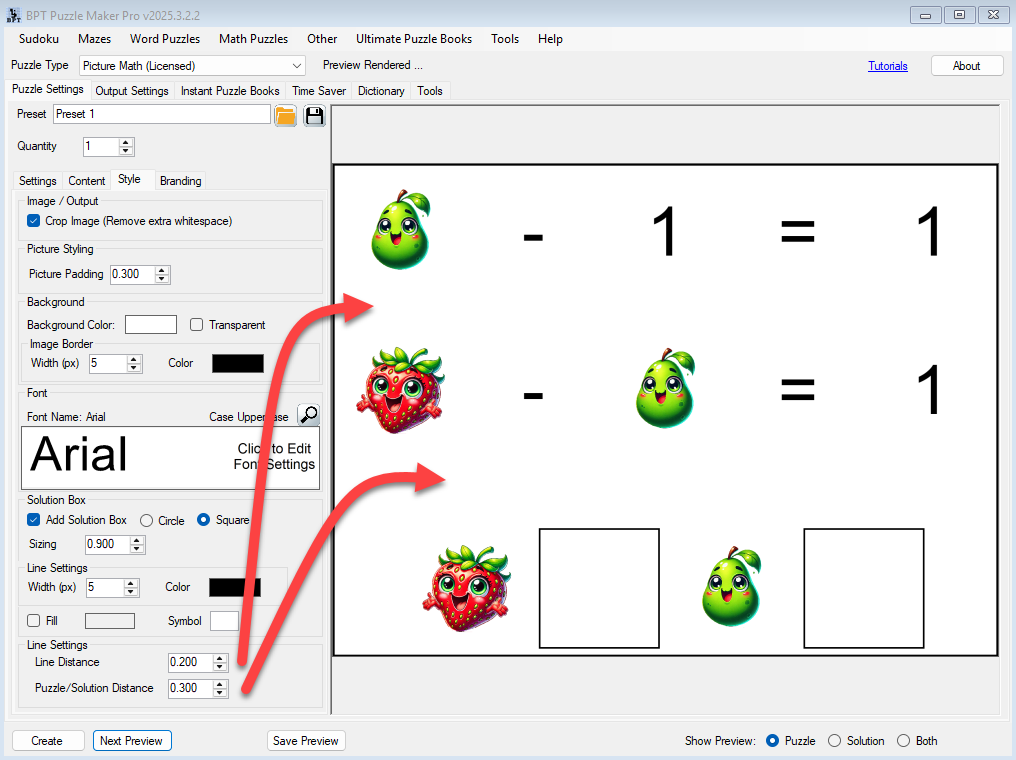
4. Adjust Line Distance
- This controls the vertical space between each equation line.
- Larger values give a looser layout, which improves readability (especially in print).
5. Adjust Puzzle/Solution Distance
- This adds extra spacing between the last equation and the solution equation.
- Useful to visually separate the “given” part from the “solve” step.
🔍 Example: For a puzzle aimed at kids, try Line Distance = .20 and Puzzle/Solution Distance = .30+.
6. Preview and Fine-Tune
- Use Next Preview to test your layout.
- Tweak spacing and padding until the visual balance feels right.
7. Create the Final Puzzle
- Once satisfied, click Create to generate your puzzle.
🎉 Outcome
You’ll now be able to:
- Use cropping to eliminate empty margins and center your puzzle visuals
- Apply picture padding for better image spacing
- Fine-tune line and solution spacing for a polished, easy-to-read layout