Customizing Styles and Themes for Magnet Logic
Every puzzle creator has a distinct visual style. Some prefer the clean, minimal look of a newspaper puzzle; others want bright colors and playful icons for children’s activity books.
Puzzle Maker Pro – Magnet Logic makes that level of customization easy.
You can control how each magnet looks, how borders are drawn, and how thematic pairs—like Cats and Dogs or Vowels and Consonants—replace the traditional + and − symbols.
This tutorial shows how to customize visual style, content themes, and branding details while keeping the logic and structure of Magnet Logic puzzles intact.
1 | Why Style Matters
A puzzle’s visual style shapes first impressions.
It determines whether your audience feels challenged, entertained, or inspired to learn.
- For educators, clarity is essential—readable fonts, distinct colors, and gentle contrast keep lessons engaging.
- For puzzle publishers, presentation defines brand identity—consistent line weights, polished borders, and elegant typography signal professionalism.
Because Magnet Logic puzzles always follow the same mechanical logic (magnets with +/− halves and optional neutrals), all customization focuses purely on presentation, not rules.
That means you can safely experiment with colors, fonts, or image pairs without affecting how puzzles are generated or solved.
2 | Region, Cell, and Puzzle Borders
Borders are the backbone of any printable logic puzzle. They define where magnets begin and end, and they give visual rhythm to your page layout.
Region Border
Each magnet occupies one rectangular region (1×2 cells).
The Region Border outlines these rectangles, clearly separating one magnet from the next.
You can increase the border weight to make magnets more distinct, or reduce it for a lighter grid.
- Thin border: clean and subtle, ideal for newspaper layouts.
- Thick border: bold and clear, perfect for educational handouts.
Cell Border
Each magnet contains two parts—a positive and a negative half.
Setting a Cell Border greater than 0 draws a dividing line inside every magnet, visually separating + and −.
This is especially useful when using colors or images, where clear division reinforces the magnetic concept.
- Default: 0 (no internal split line).
- Recommended: 0.5–1 pt for clear division in color puzzles.
Puzzle Border
The Puzzle Border frames the entire grid.
It gives your puzzle a defined edge and makes it easier to position on printed pages or inside a layout template.
When publishing multiple puzzles per page, use consistent outer borders to align visuals across your book.
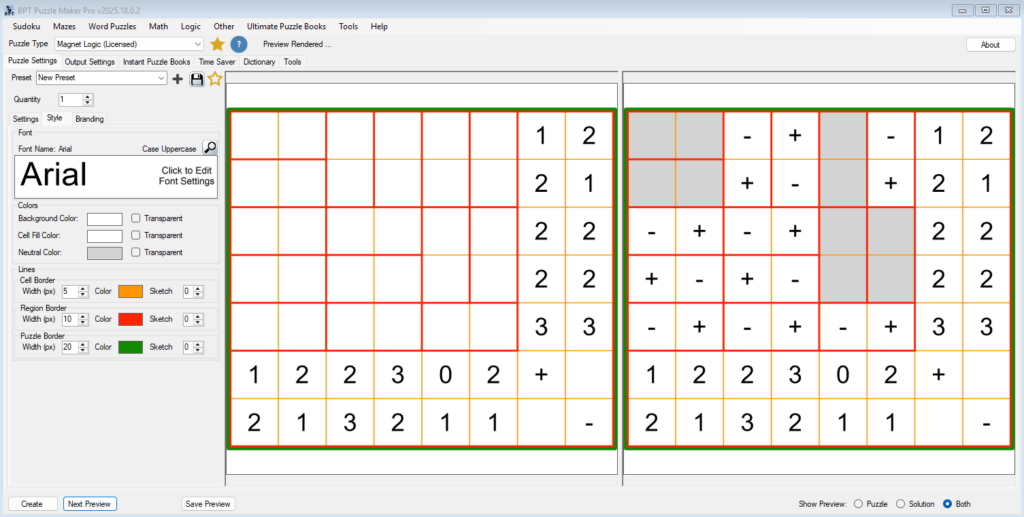
3 | Using Fonts and Symbols
If your puzzle uses letters, numbers, or symbols instead of +/−, font choice becomes a design element.
Font Type
Puzzle Maker Pro supports custom TrueType fonts, allowing you to match your brand or educational theme.
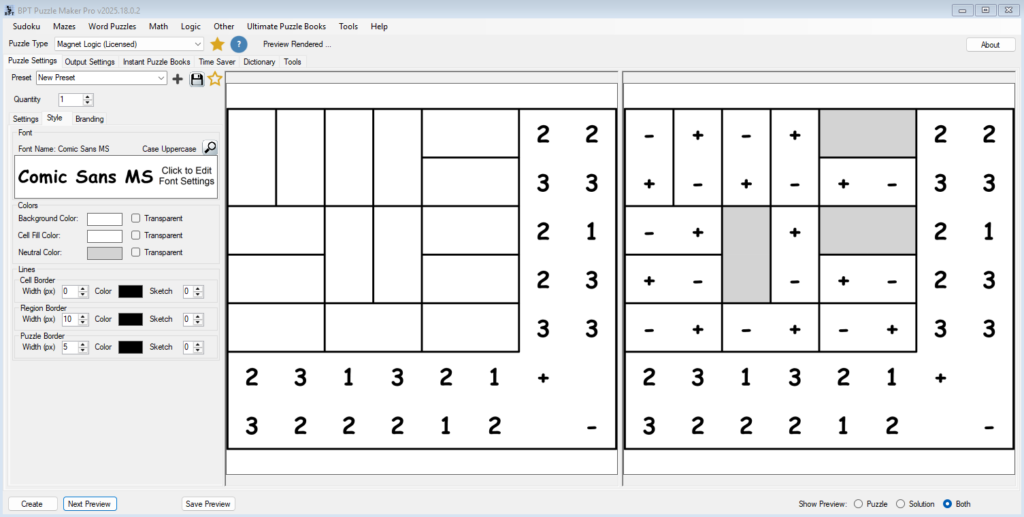
- Sans-serif fonts (e.g., Arial, Calibri): clean and modern, easy to read at small sizes.
- Serif fonts (e.g., Times, Georgia): traditional and professional.
- Outlined or bold fonts: work well in coloring books or high-contrast designs.
Font Size and Alignment
You can adjust:
- Font size (to match grid dimensions).
- Horizontal and vertical alignment (center, top, bottom).
The preview updates instantly, helping you verify balance between symbol size and border weight.
4 | Applying Colors and Backgrounds
Color settings control the personality of your puzzle.
They help distinguish magnets, neutrals, and solution views while staying consistent across pages.
| Setting | Description | Example Use |
|---|---|---|
| Background Color | Areas outside the puzzle, the canvas | Transparent or White |
| Cell Fill Color | Cell fill color | Soft gray or white for clarity |
| Neutral Color | Distinct shade for neutral rectangles | Light gray (standard) or themed tones |
Tip: Use high-contrast combinations for print, and soft complementary colors for digital worksheets.
Avoid dark fills behind letters to preserve readability at small font sizes.
Puzzle Area vs Full Image
You can color the entire puzzle area separately from the background, giving you more flexibility when creating themed designs or grouped puzzle sets on the same page.
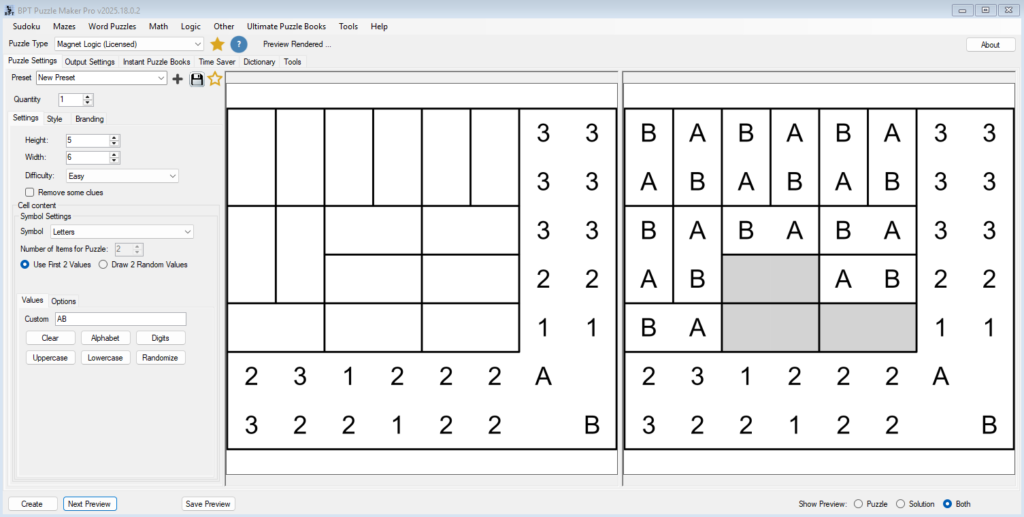
5 | Introducing Thematic Content (Pairs and Icons)
The hallmark of Magnet Logic is flexibility—you can replace + and − with any pair of contrasting symbols or images.
These are called content pairs or themes.
Examples of Thematic Pairs
| Theme | Example Pairs | Audience |
|---|---|---|
| Classic Polarity | + / − | General, newspaper puzzles |
| Letters | A / B or vowels / consonants | Language or phonics lessons |
| Colors | Red / Blue, Green / Orange | Early learners |
| Images | Cat / Dog, Sun / Moon, Hero / Villain | Kids’ puzzle books, themed collections |
| Numbers | 1 / 0 or 2 / 4 | Math-based or logic-training puzzles |
When you use themed content, the mechanism remains magnetic—you’re still creating a +/− structure internally.
For example:
- “No cat may touch another cat horizontally or vertically” = “No + adjacent to +.”
- “Each rectangle must contain one vowel and one consonant” = “Each magnet has one + and one −.”
This ensures puzzles remain compatible with automated generation, uniqueness checks, and Instant Puzzle Books.

6 | Consistency Across Puzzle Sets
If you’re creating a full book or classroom set, maintain consistent style through Presets.
Presets store:
- Grid dimensions
- Border and color settings
- Fonts and content type
- Difficulty level
Each new puzzle generated under the same preset will share the same layout and color palette—essential for professional publication or classroom branding.
You can create multiple presets such as:
- Classic Black & White (for general print books)
- Kids Color Edition (brighter tones and thicker lines)
- Holiday Theme (images + soft red/green hues)
7 | Branding and Signature Elements
For publishers or teachers who produce large puzzle collections, branding elements reinforce identity.
Title and Watermark
You can add:
- Puzzle titles (above or below the grid)
- Watermark text (e.g., website URL or class name)
- Logo images scaled to fit inside the page frame

Consistent Margins
Define a standard page layout: equal spacing above/below the puzzle border, and alignment with headers or numbering.
This helps your puzzles appear uniform across different modules and instantly recognizable as part of your brand.
8 | Exporting Styled Puzzles
When your visual design is ready, export in any supported format:
| Format | Purpose |
|---|---|
| PNG / JPG | High-resolution images for books, printables, or social media |
| Transparent PNG | Allows overlay on colored backgrounds or templates |
| Single puzzles worksheets, or classroom handouts | |
| Instant Puzzle Books | Generates full collections automatically, retaining your visual settings |
All exports maintain your chosen colors, fonts, and line weights exactly as shown in the preview.
9 | Design Tips for Print and Classroom Use
- Keep borders subtle: over-thick lines can overwhelm small grids.
- Test contrast in grayscale: many printers don’t reproduce colors exactly.
- Avoid excessive color variation: two or three tones per puzzle are usually enough.
- Check readability: font should remain legible when printed at smaller sizes.
- Leave breathing space: wider margins improve visual comfort.
- Label solutions clearly: if exporting both puzzle and solution on one page, use consistent markers or page numbering.
10 | Summary
| Aspect | Customization Options | Benefit |
|---|---|---|
| Borders | Region, cell, and puzzle borders | Clear structure, professional look |
| Fonts | Type, size, alignment | Matches brand or audience style |
| Colors | Foreground, background, neutral, region | Visual hierarchy and theme |
| Content Pairs | Letters, colors, images | Thematic flexibility |
| Presets | Save and reuse styles | Consistent branding |
| Exports | PNG, PDF, Instant Book | Ready for print and publishing |