Interactive Puzzles: Publish a Single Puzzle Online
Overview
Interactive puzzles are a powerful way to attract and engage visitors on your website. By publishing a Puzzle Maker Pro puzzle as an interactive HTML page, you give readers the chance to try a puzzle instantly—perfect for showing samples, promoting your books, or keeping your audience engaged.
This tutorial shows you how to export one puzzle as a standalone interactive page and link it directly from your site, blog, or email.
Required Modules
- Any Puzzle Maker Pro module that supports HTML output
(currently available for Binary Puzzles and Queens puzzles, more coming soon)
Preparation
Before you start, make sure you have:
- Access to Puzzle Maker Pro modules that support HTML output
- Hosting access to your website
- A folder where you’ll upload and keep the puzzle files together
Exporting with HTML Output
- Go to the module that has the puzzle type you want to create.
- Open the Output Settings tab.
- Check HTML output (you may combine this with PDF, PNG, or other formats).
- [Screenshot: Output Settings with HTML selected]
- Click Create.
- A new puzzle (or multiple puzzles if batch options are used) will be generated with all the selected outputs.

HTML Puzzle Setup
On the Branding tab, you’ll find a set of HTML options that affect the puzzle page:
- Title – Select one of the preset title options or ‘custom’
- Custom title – change the title text displayed in the browser tab
- Custom file name – rename the trio of output files (HTML, JSON, SVG)
- Custom HTML – to select use your own customized HTML template
- Custom CSS – to select user your own customized CSS (Style Sheet)
Note: Custom HTML files need the required elements to work properly.

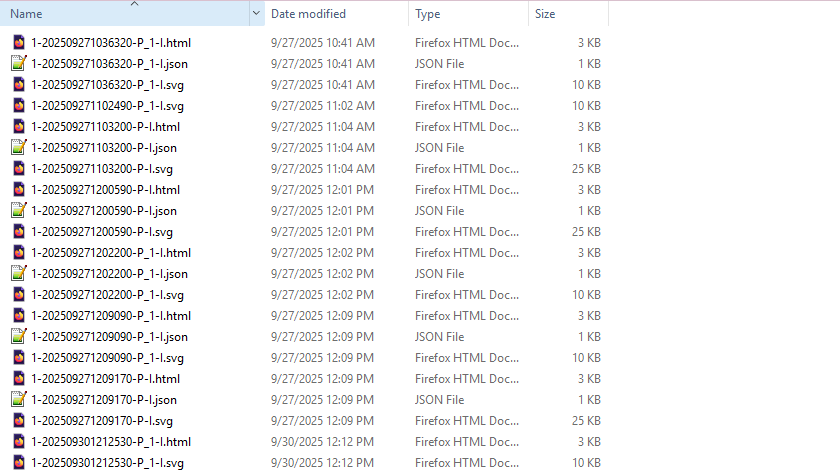
Each exported puzzle will generate three files with the same name:
puzzle-name.html– the puzzle player pagepuzzle-name.json– the puzzle configurationpuzzle-name.svg– the puzzle graphics
Optional: If your puzzle uses icons or images, keep those files in the same folder as well.
Step-by-Step
1. Collect the Files
After export, gather the puzzle files in one folder:
/puzzles/
  my-puzzle.html
  my-puzzle.json
  my-puzzle.svg
  (optional images/icons)
Make sure the filenames match before the extension (e.g. my-puzzle.html, my-puzzle.json, my-puzzle.svg).

2. Upload to Your Website
- Use your hosting control panel or FTP program to upload the puzzle folder.
- Place it anywhere you like, for example:
https://yourwebsite.com/puzzles/my-puzzle.html
Note: We’re working on a gallery style WordPress plugin, ETA Q4 2025
3. Link to the Puzzle
- From your site, blog, or email newsletter, link directly to the puzzle page:
Try an interactive puzzle: https://yourwebsite.com/puzzles/my-puzzle.html
Visitors can now solve the puzzle directly in their browser.
Outcome
You now have a working interactive puzzle page ready to share.
- Visitors can click cells to solve the puzzle
- Errors (like triplets or too many symbols in a row/column) are highlighted automatically
- Includes Reset and Validate buttons and a timer for added engagement
This setup is ideal for:
- Offering free puzzle samples
- Promoting your puzzle books
- Keeping visitors on your website longer
Further Reading
- 👉 Want to publish multiple puzzles on one page with a dropdown menu? See Interactive Puzzle Gallery.
- 👉 Ready to customize the puzzle page with your own CSS or HTML? See Interactive Puzzle Page Customization.
