Getting Started with Mazes 3D Isometric
Mazes 3D Isometric was created to be interactive. The best way to learn how it works is to change the settings and click “Preview”. To get you started, or as reference, you can check out this tutorial.
Mazes 3D Isometric Overview
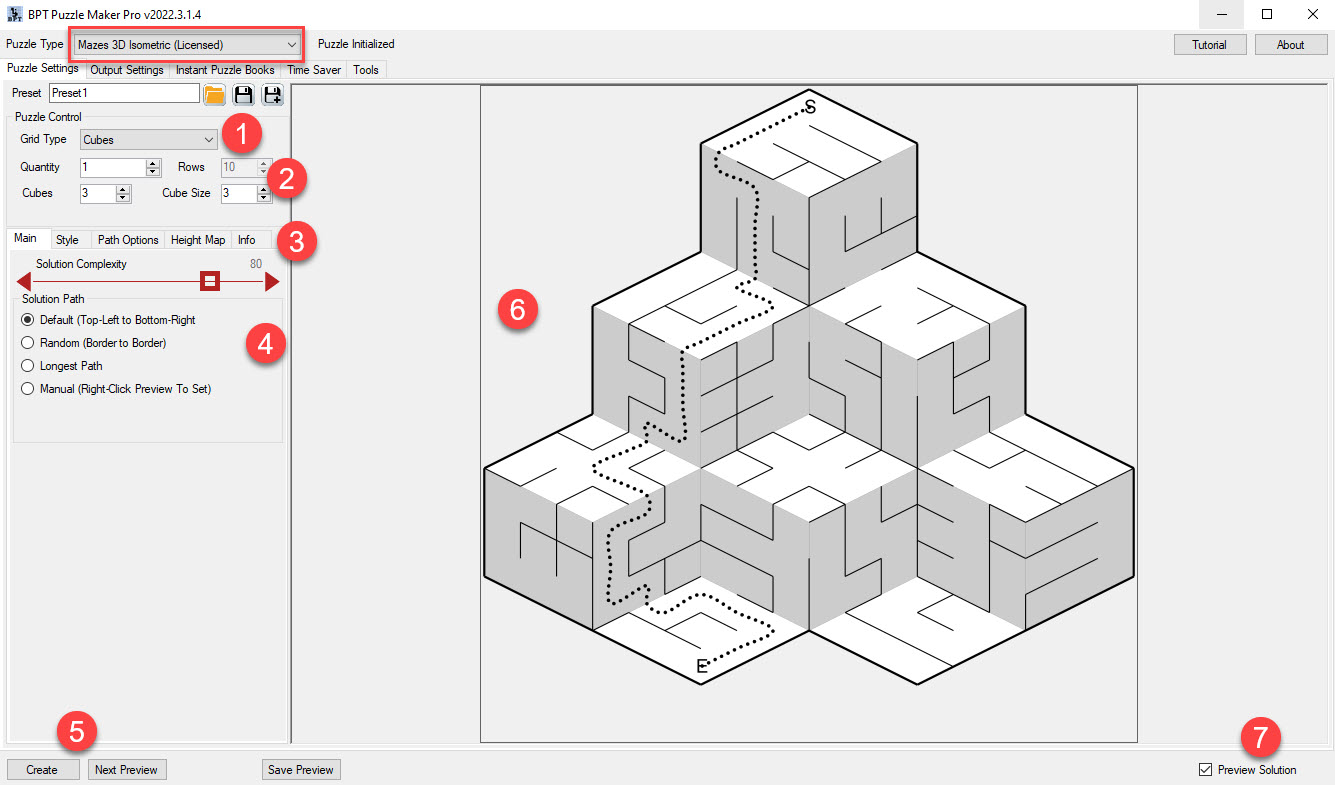
After selecting “Mazes 3D Isometric” in the drop-down menu at the top, you’ll see a view like this:
Every Puzzle Maker Pro module consists of several parts:
The puzzle settings at the left, a puzzle preview (6) at the right, buttons to create puzzles or previews at the bottom (5) and the option to display the puzzle preview or the solution preview (7).
For Mazes 3D Isometric you’ll see the following options:
- Preset function at the top. Presets are just files saved on your computer, there’s no limit. (If you want to clean up or copy your presets, there’s an easy access button on the Tools tab)
- The Grid Type, to select between different built-in 3D map options
- Grid Type configuration (2), to set the number of rows, or the number of cubes and the cube size (this depends on the grid type)
- Detailed options, consisting of several tabs (3):
- Main, Maze Generator control (4)
- Style, How the generated maze will look
- Path Options Add-On
- Height Map Editor Add-On
- Info – To check your licenses for Mazes 3D Isometric modules, in case you’re not seeing everything you’d expect to see
The best thing you can do, is to change colors, move sliders, and change other options, click Preview, and see what happens.
Maze Generator
The Maze Generator can be configured by you in several ways: by changing the maze generator algorithm, and by controlling the start and end points.
Maze Generator Algorithm
The maze generator is a mix of several algorithms. You can control the mix, using the “Solution Complexity” slider. Setting it to 0 (zero) will result in fairly long straight paths, while a setting of 100 will create a chaotic meandering maze. To get an idea of the results, here are two mazes with the extreme settings:
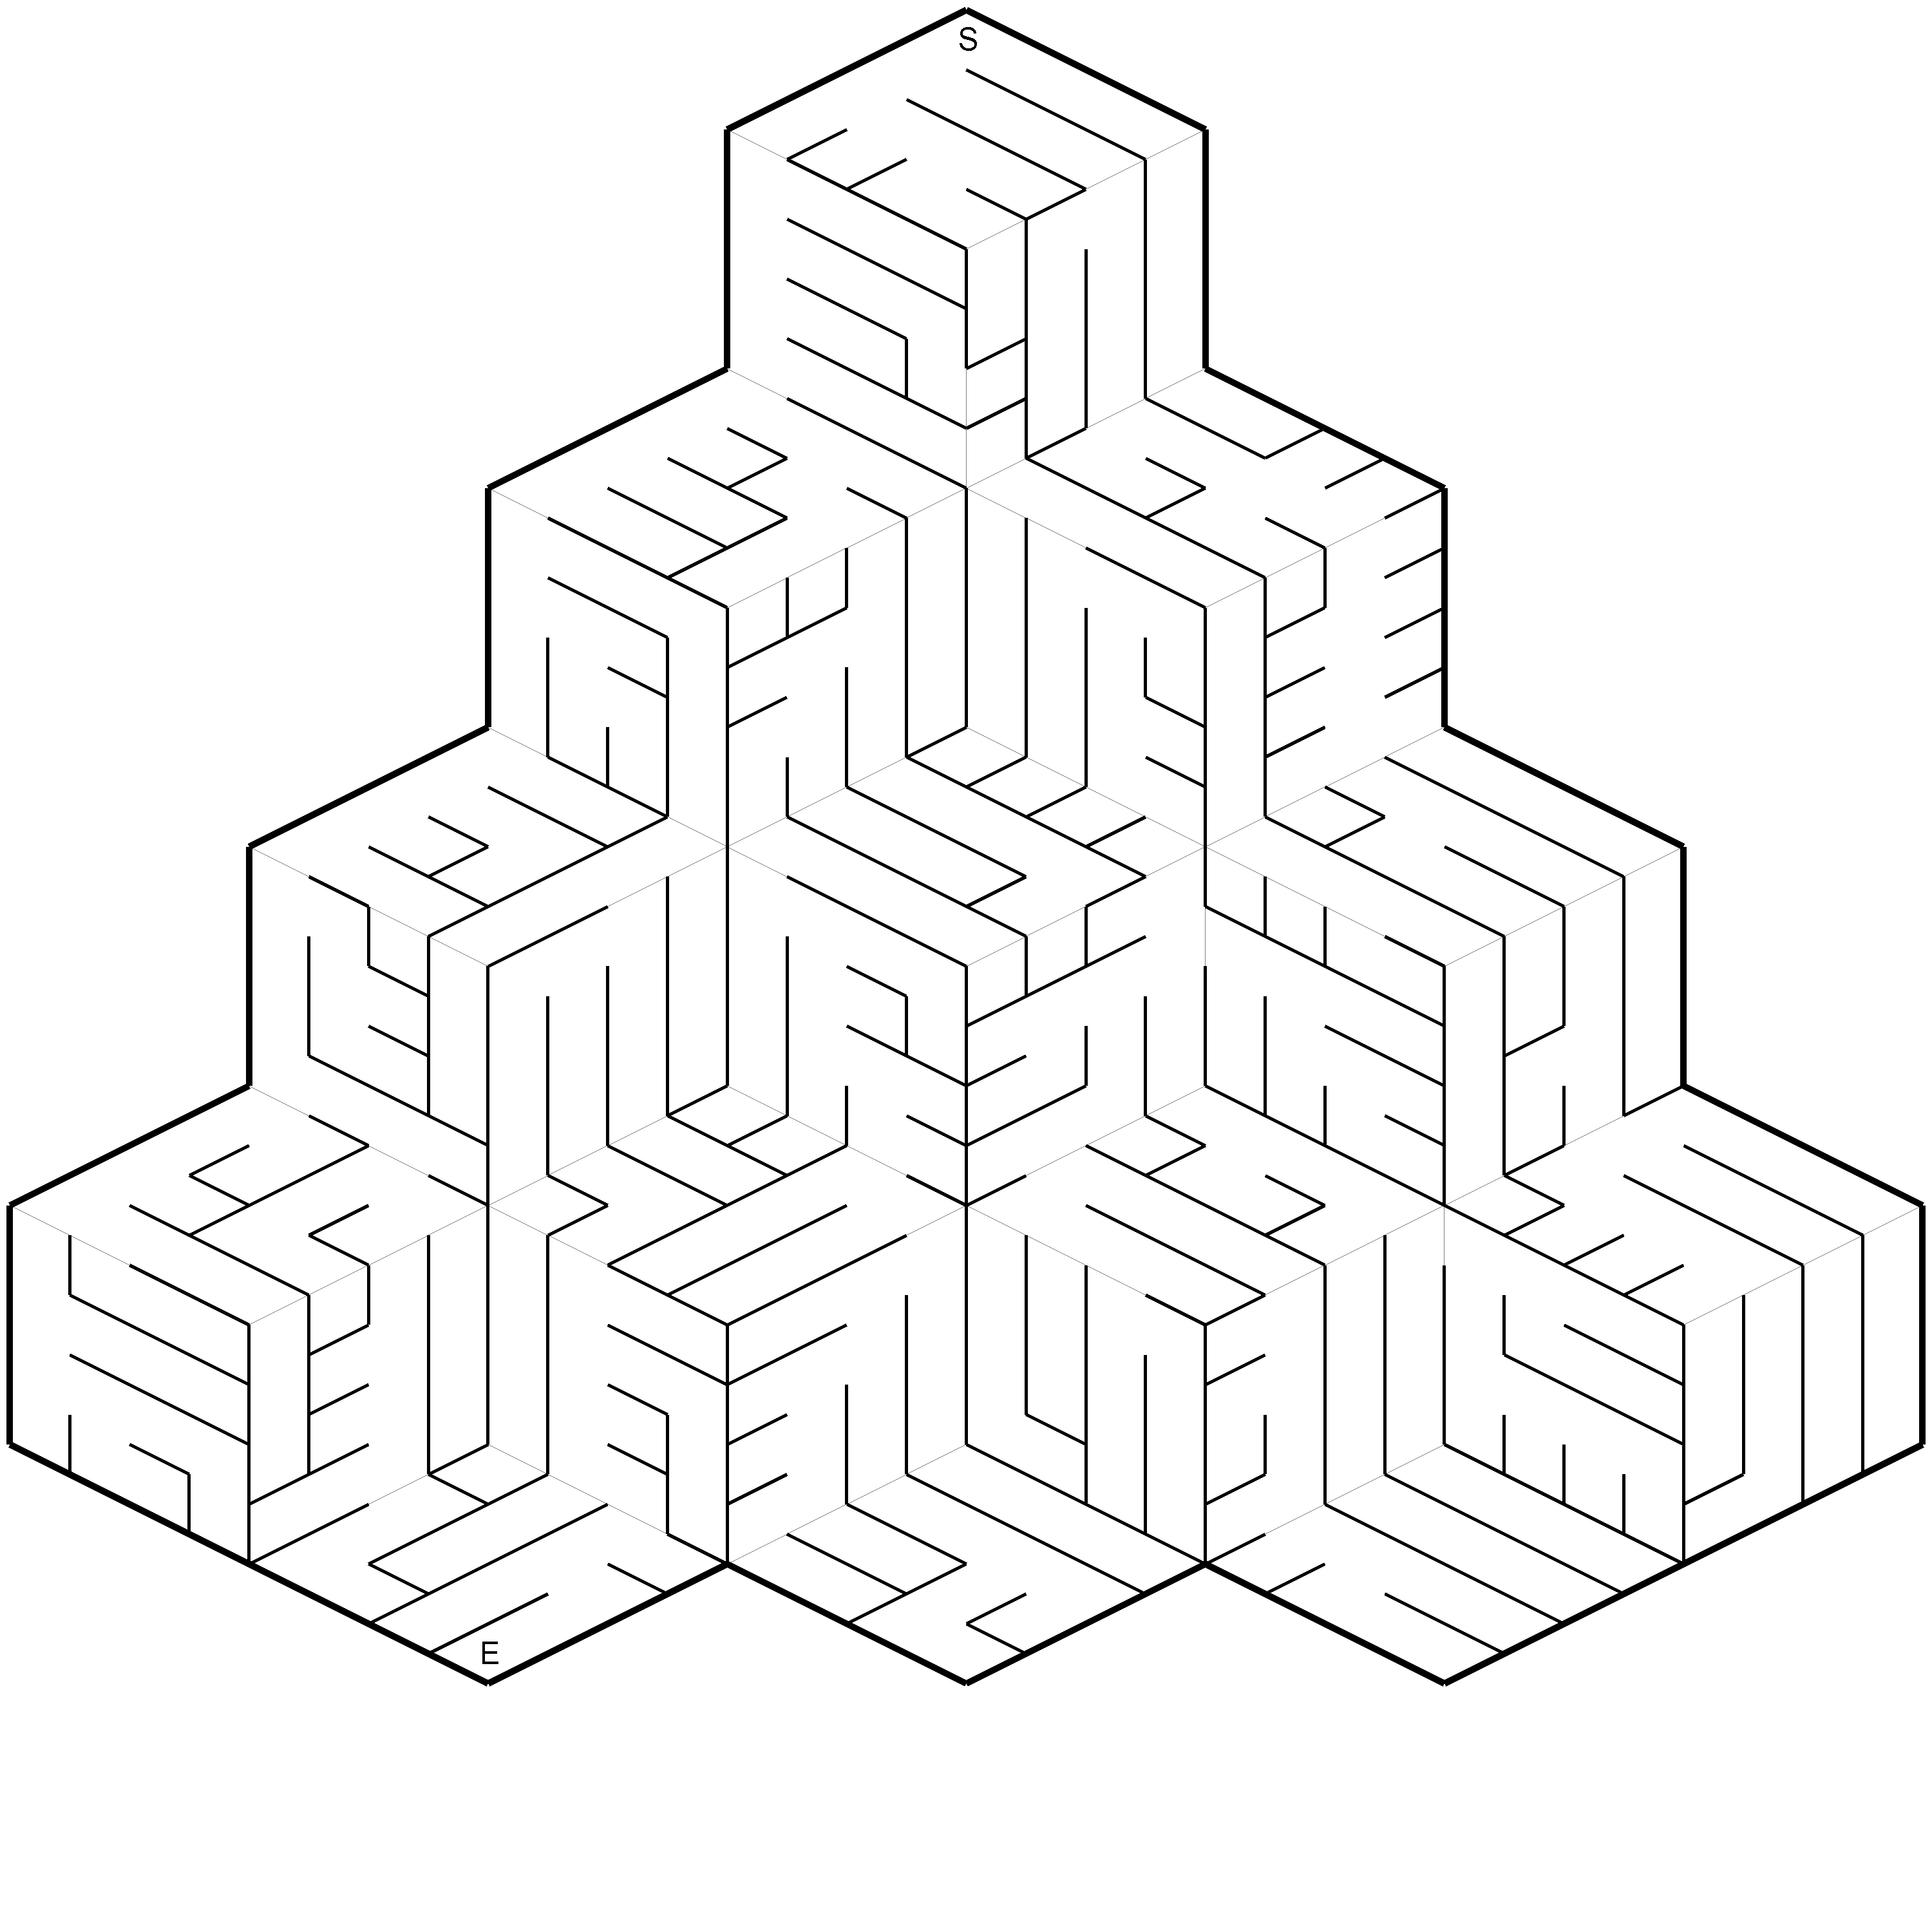
Mazes 3D Iso Complexity 0 Example
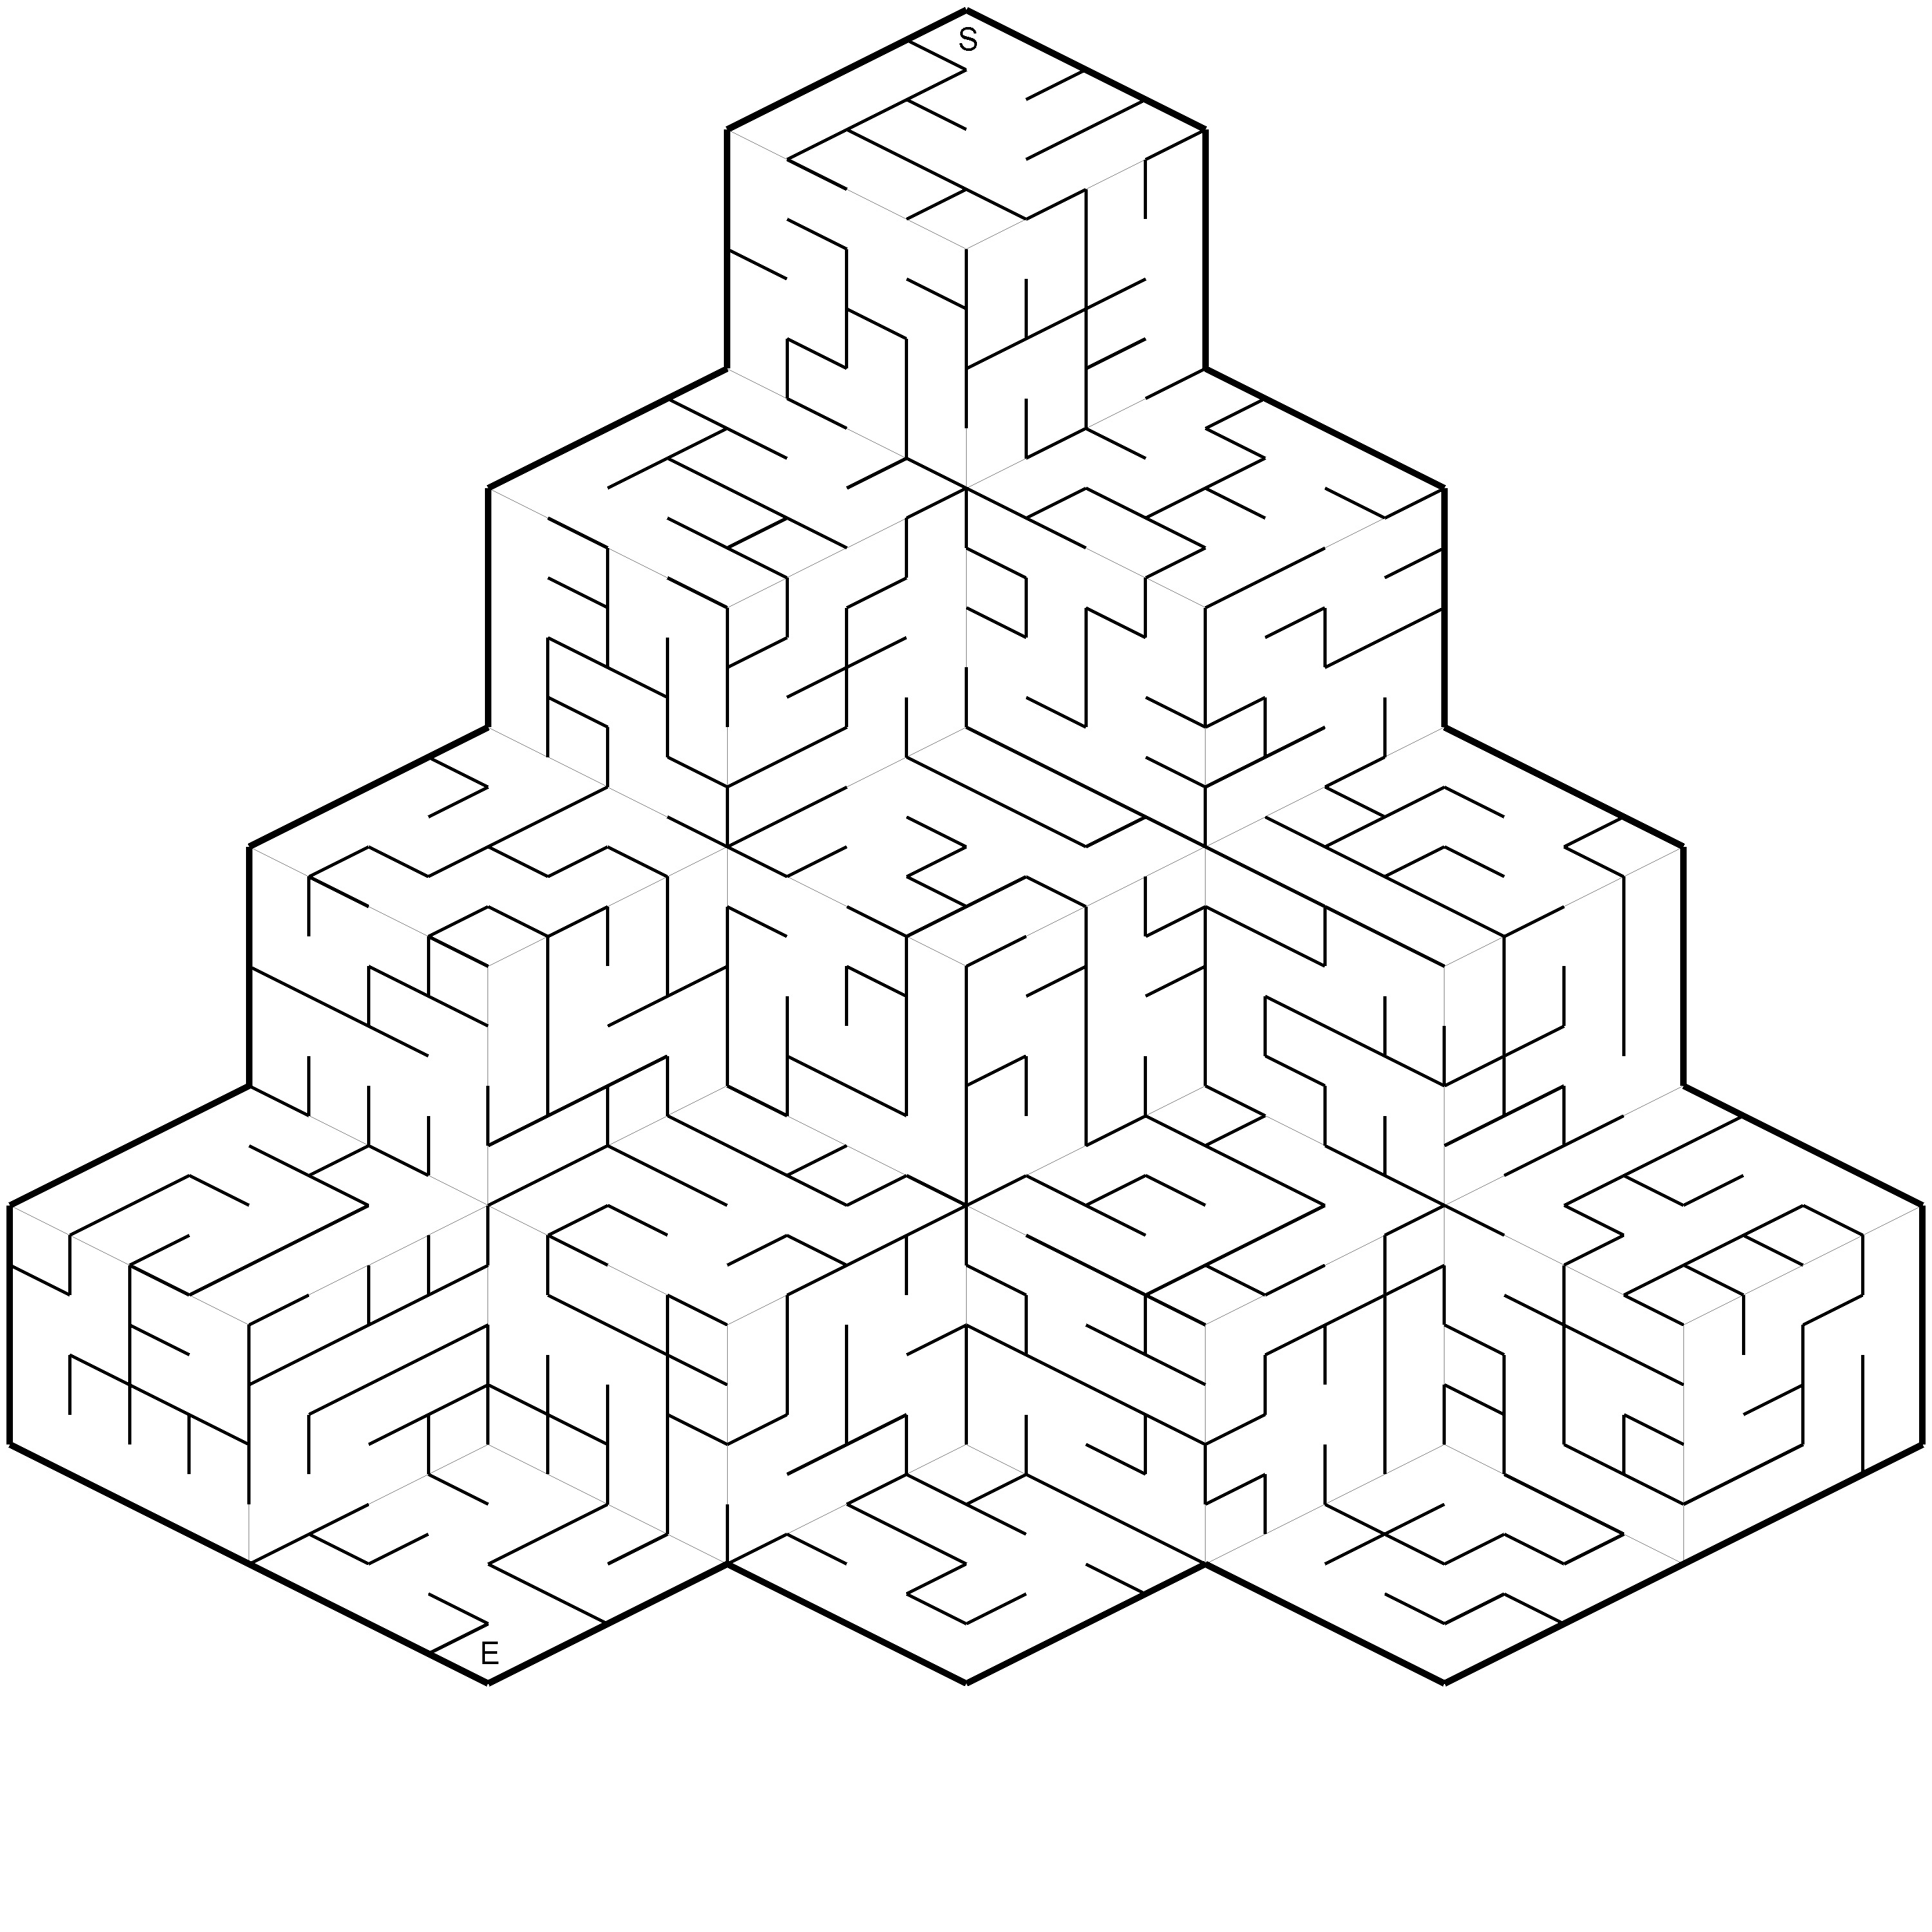
Mazes 3D Iso Complexity 100 Example
Besides the difference in solution complexity, for 3D Isometric mazes, the effect on the 3D look and feel is also different.
Start and End Point Options
There are several options to set the Start and End points:
- Default: This will create a maze from Top to Bottom. The exact end-points will depend on the maze type and settings
- Random: Create a path from one (randomly selected border) to the one across it
- Longest Path: This will generate a maze first, and then find the longest possible path in the maze, and set the Start and End points accordingly
- Manual: You can select the Start and End points, by right-clicking on the maze, and then select Start or End point from the popup menu. Please be aware that the maze, the paths in maze, the cell connections, will change every time a maze is generated. The Manual points will be reset when you change the grid type or change to a different option.
Grid Types
The current version of Mazes 3D Isometric has several built-in 3D maps, along with a Random Map and the Custom Height Maps (requires the Height Map Editor Add-On).
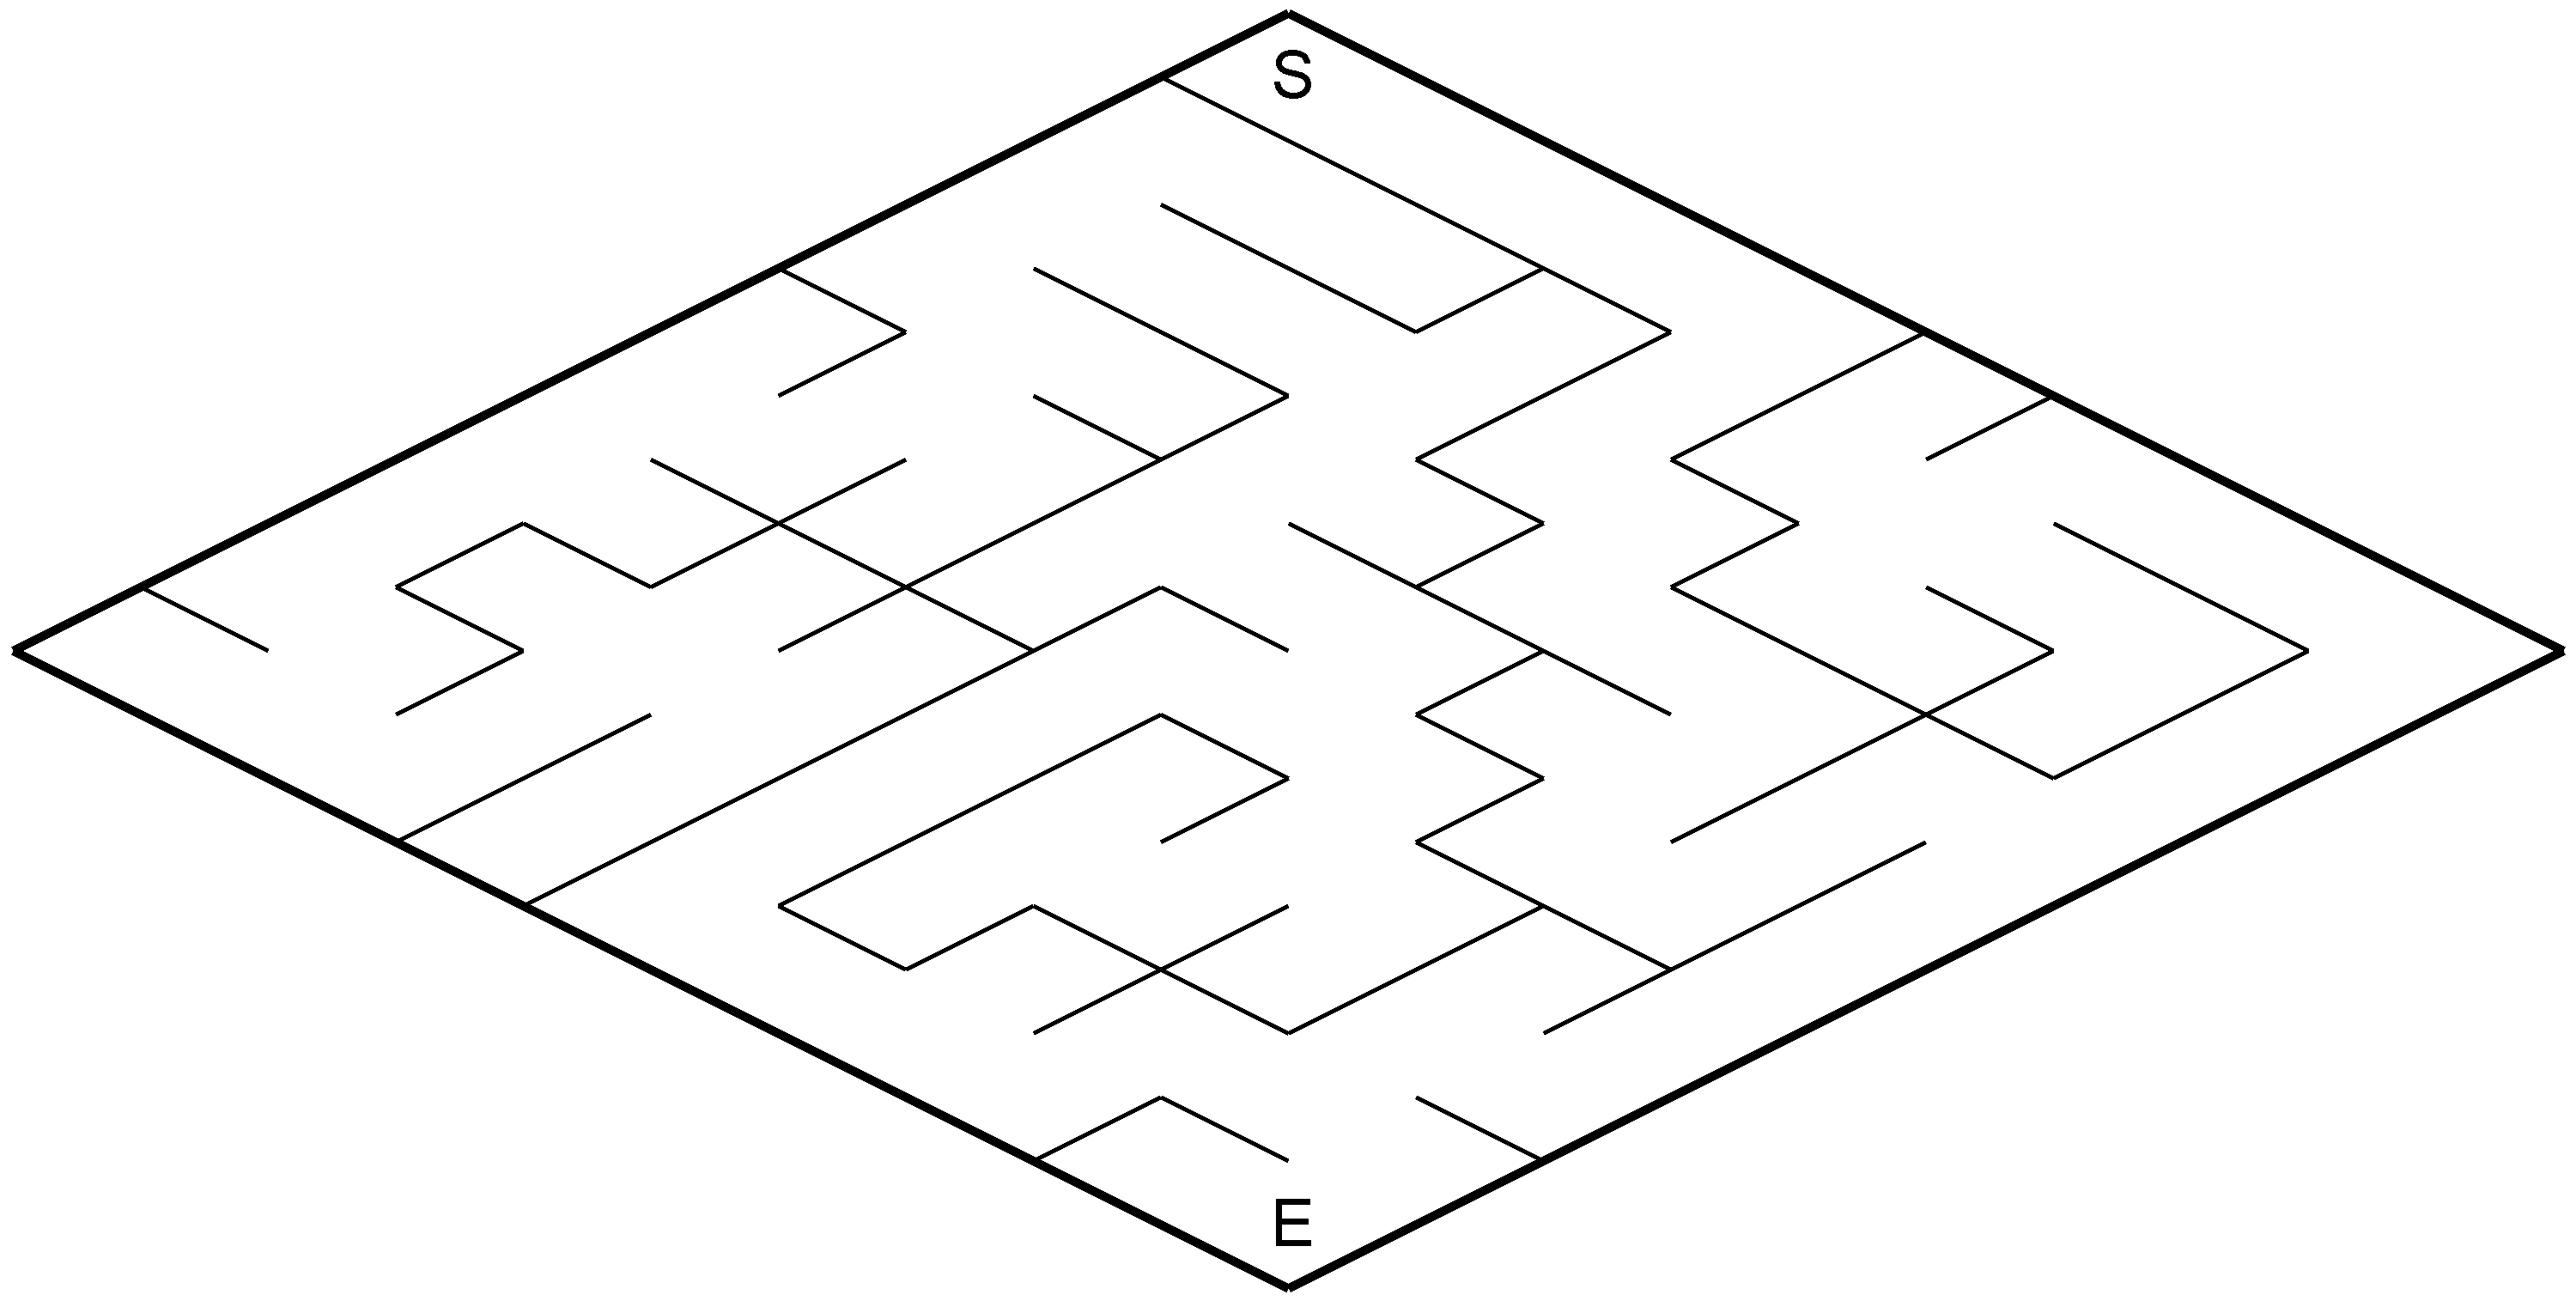
The Flat map is a simple, flat map in isometric style. You can set the size using the “Rows” setting.
Mazes 3D Isometric Cubes
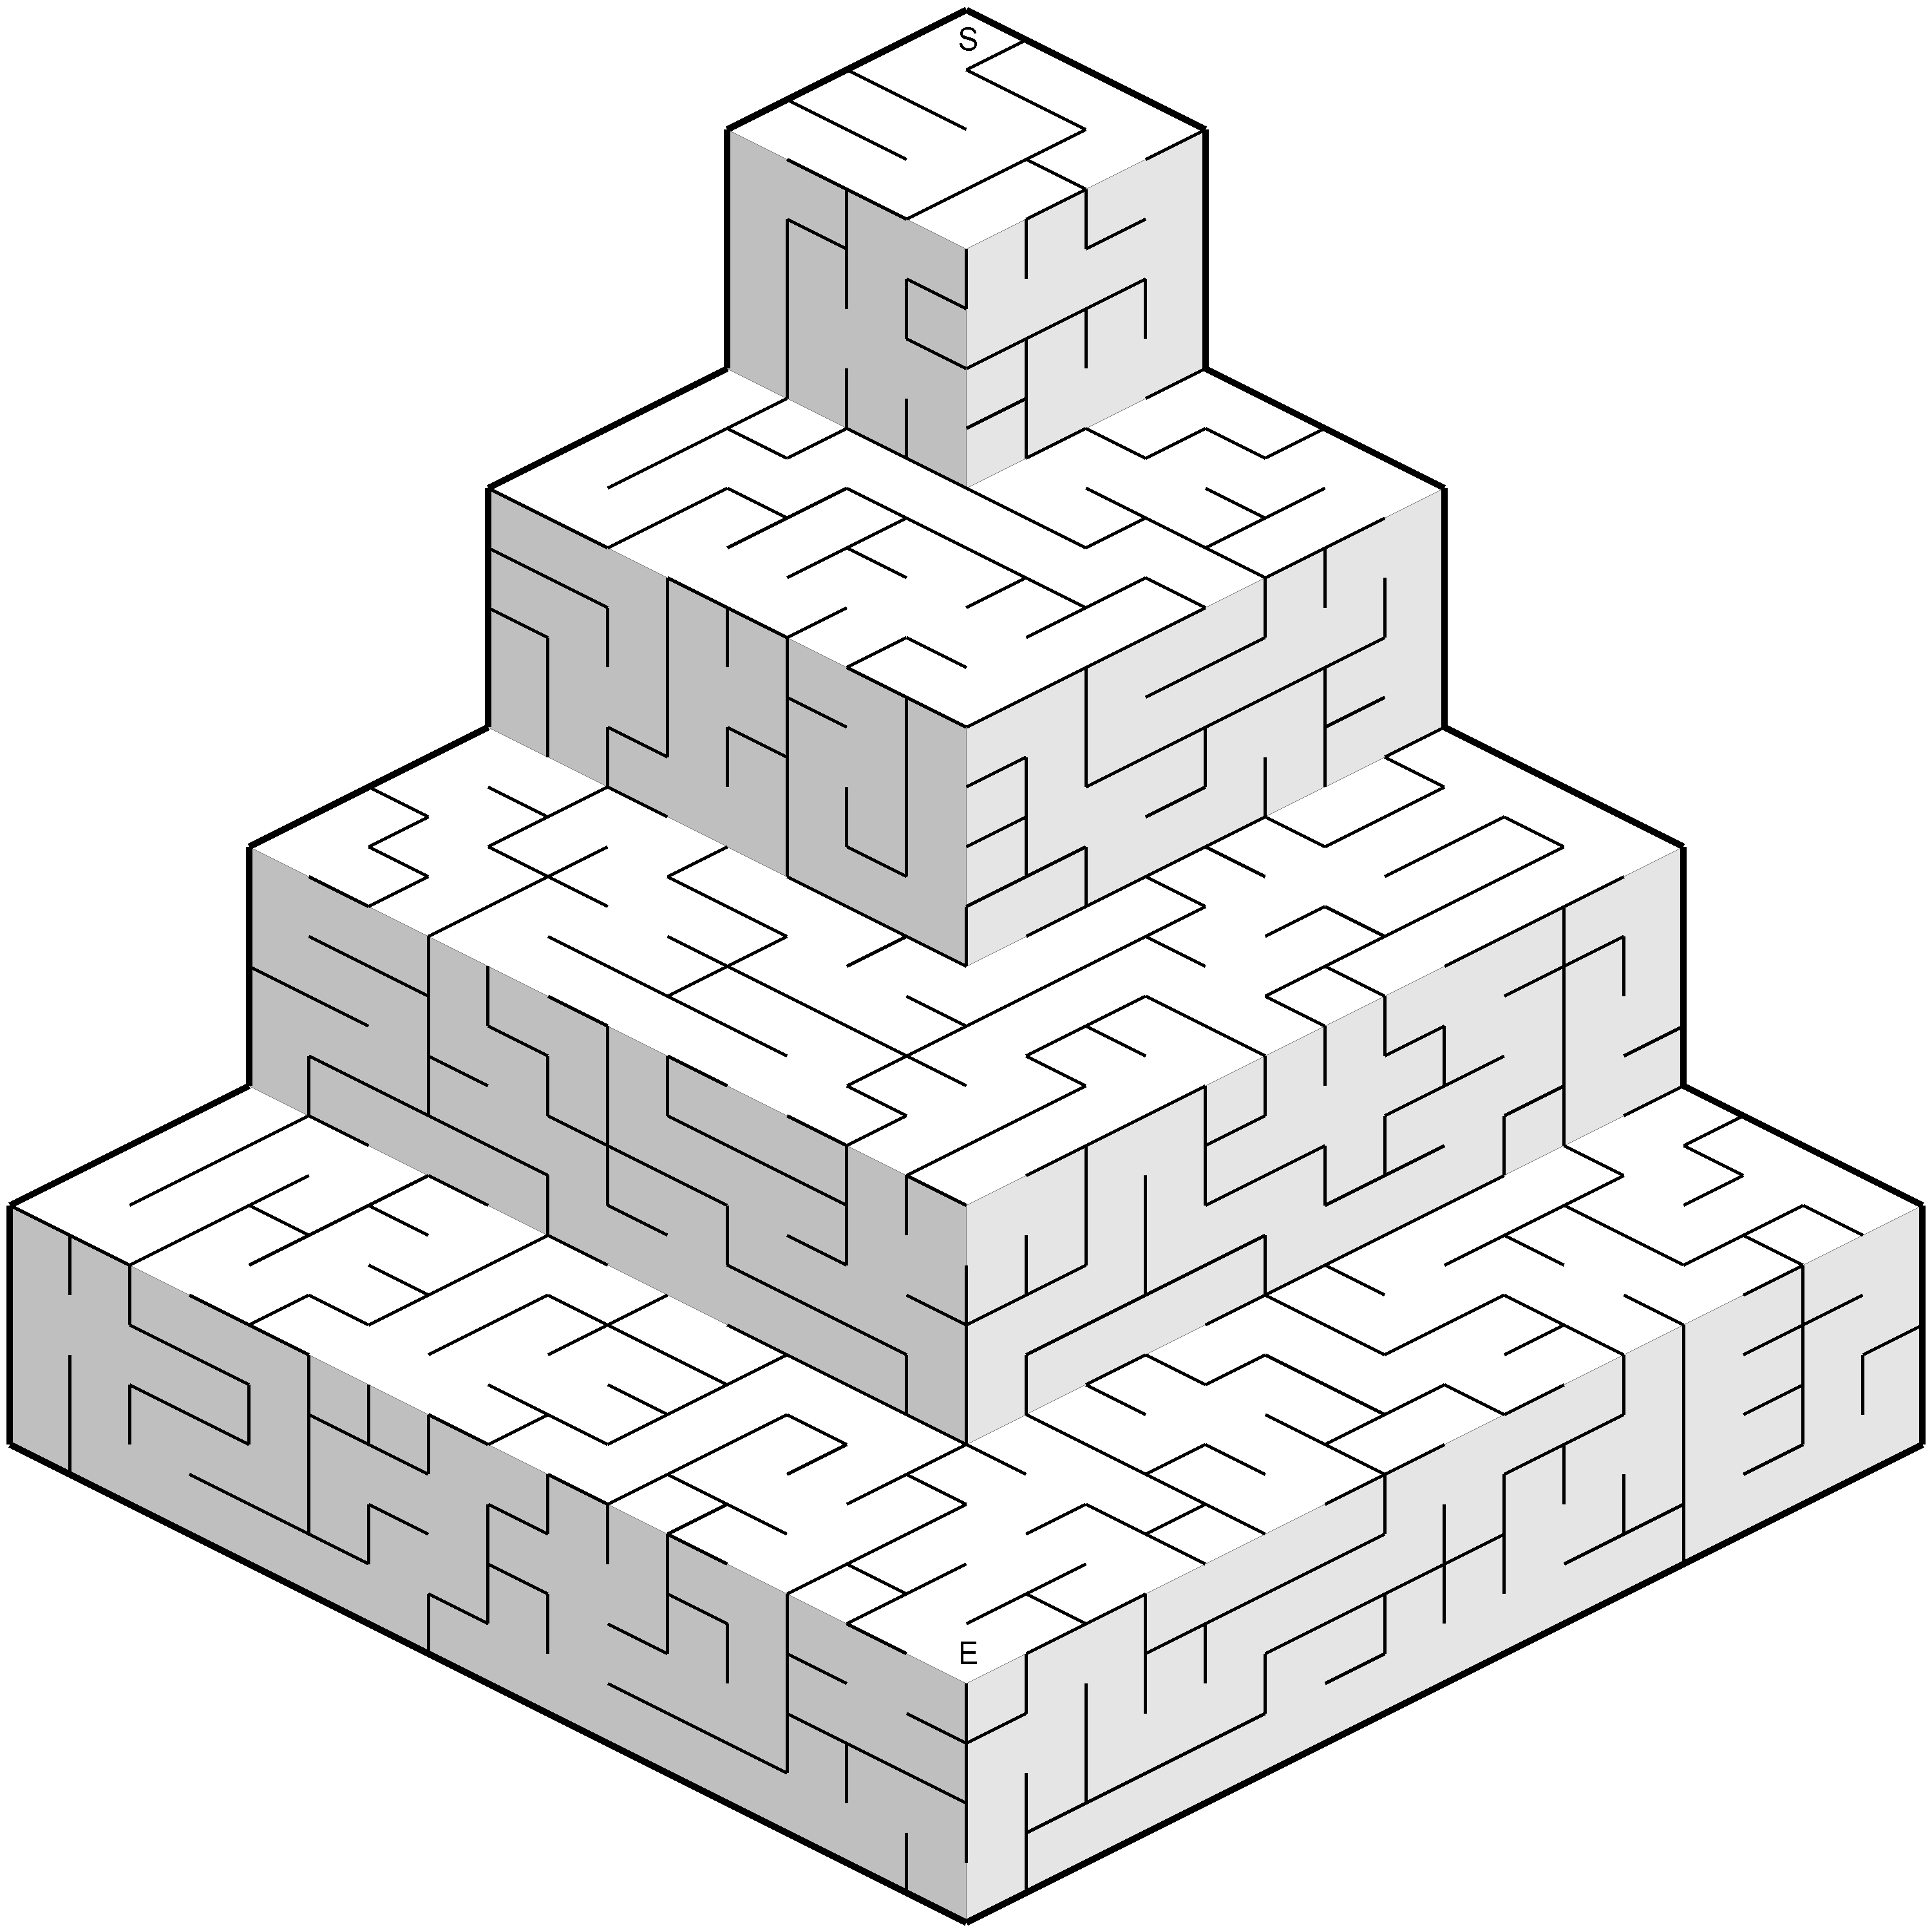
Mazes 3D Isometric Tower Example
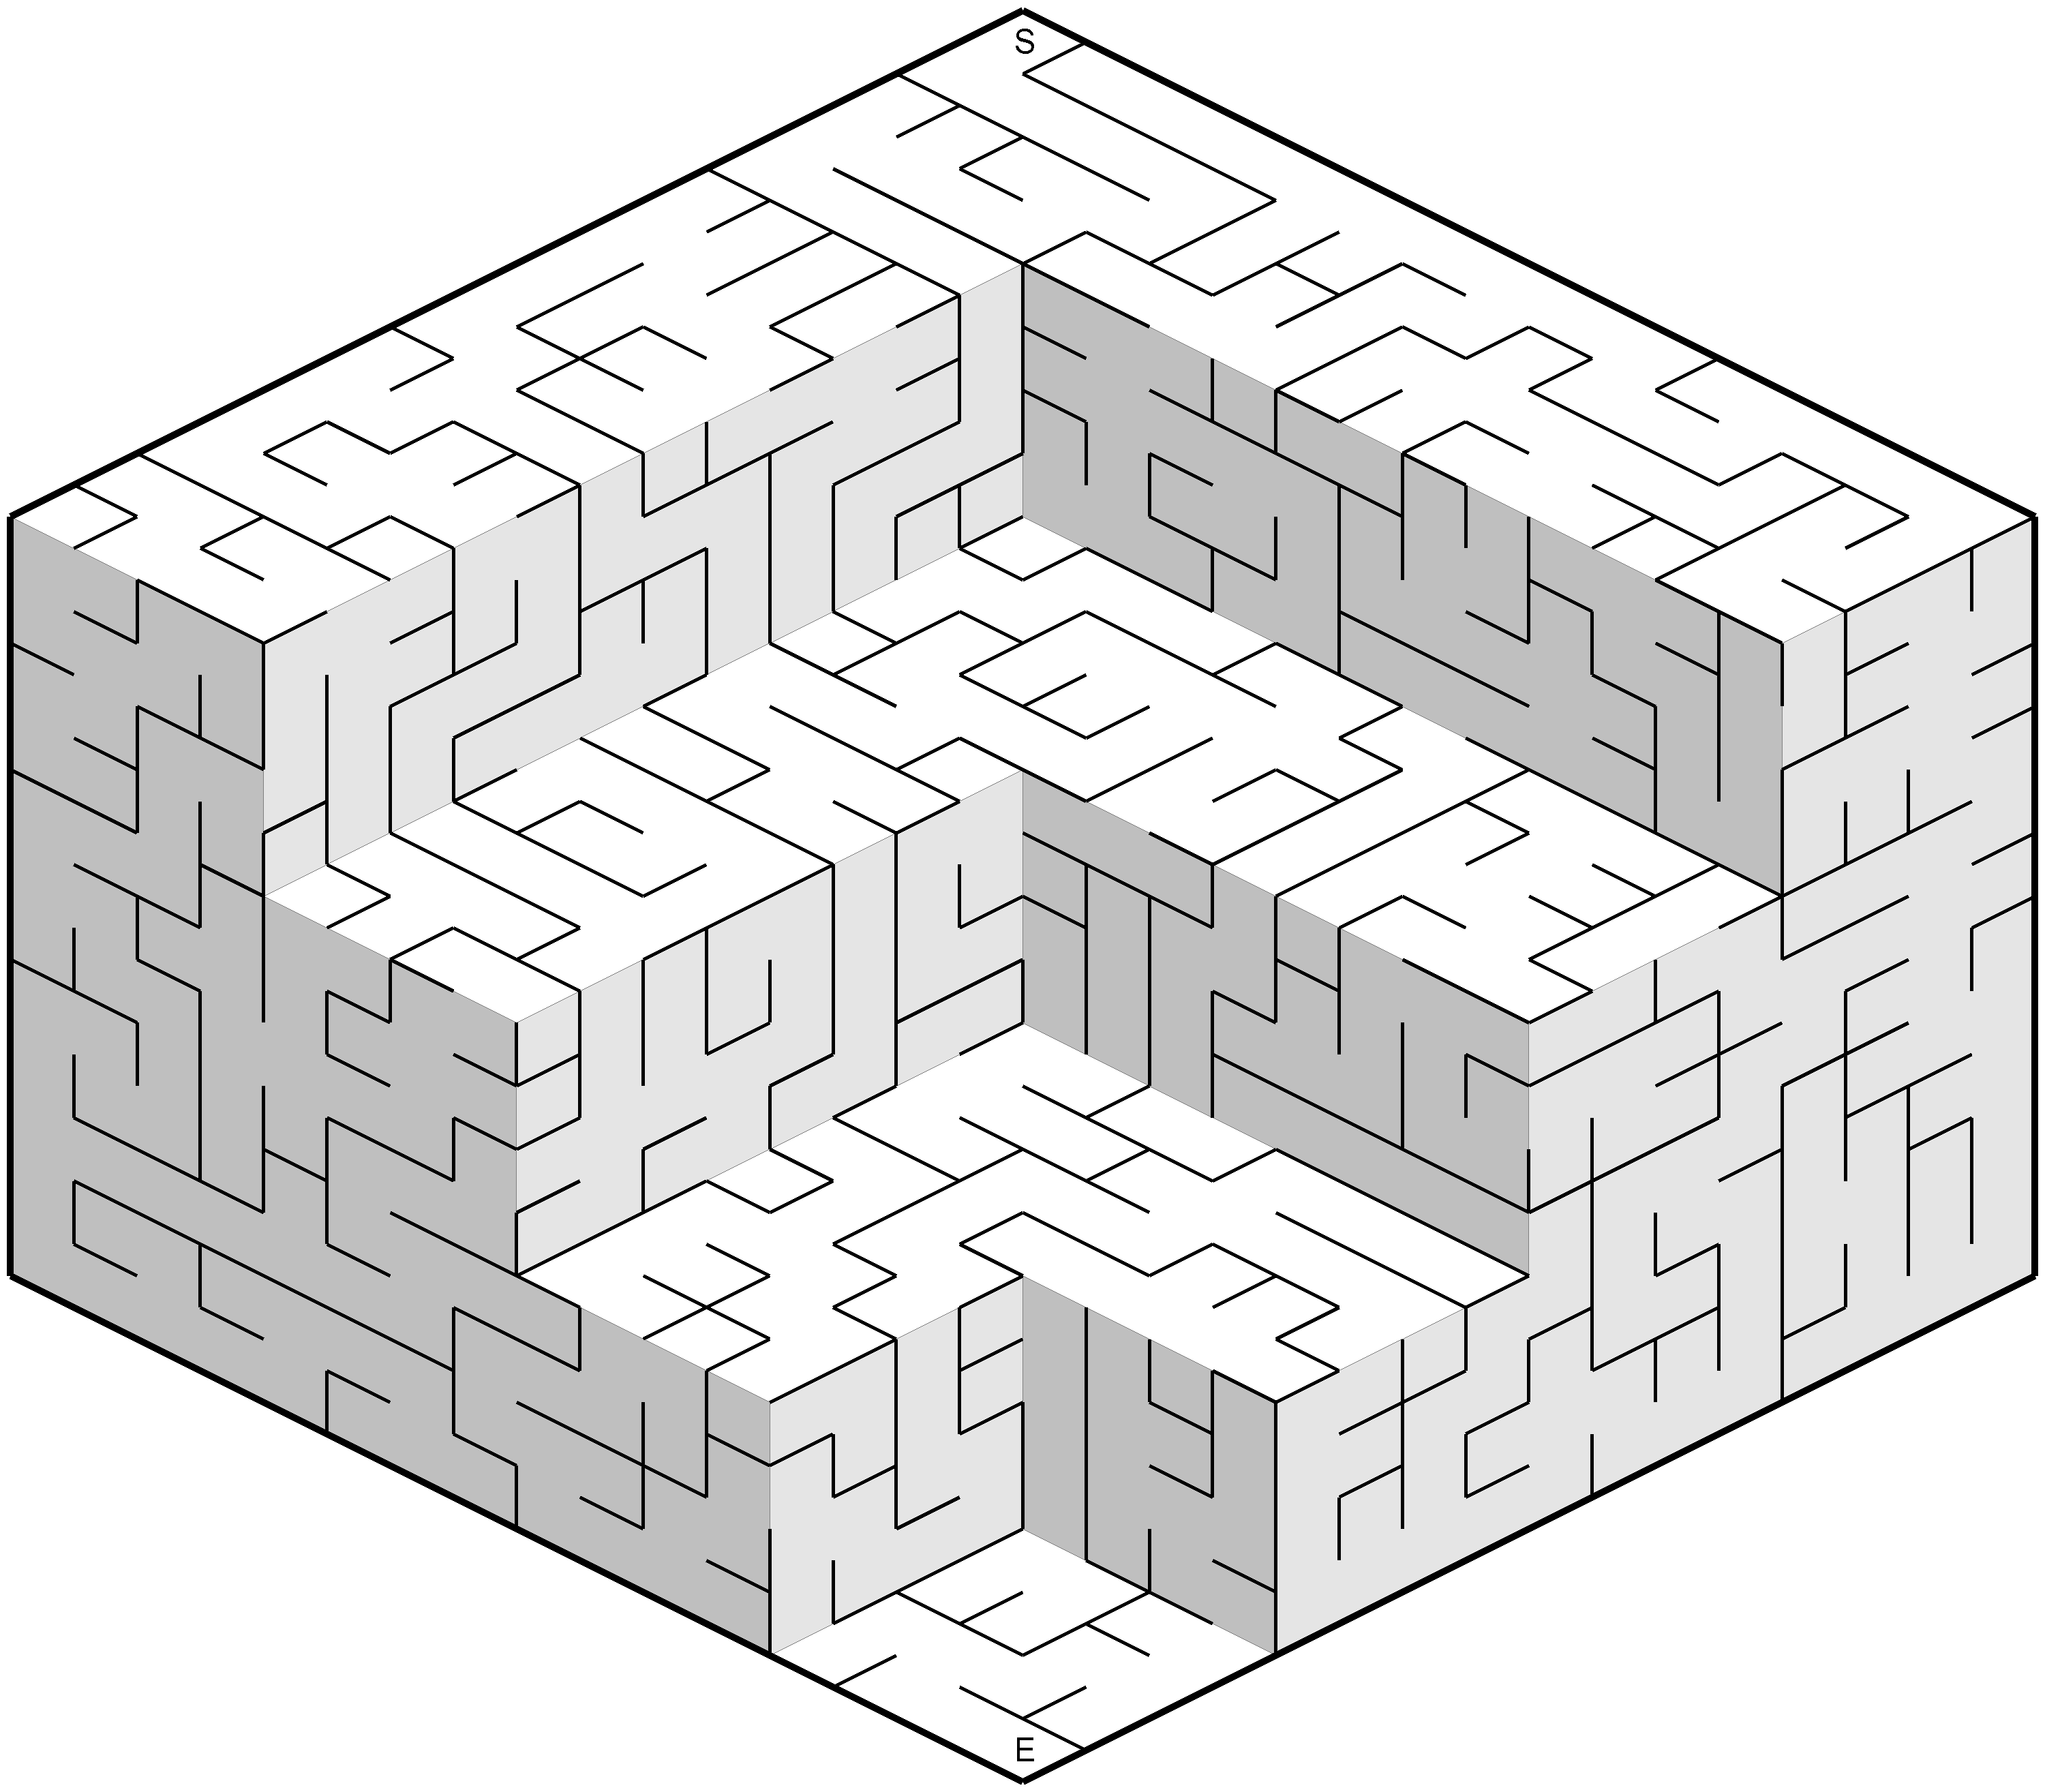
Mazes 3D Isometric Colosseum Example
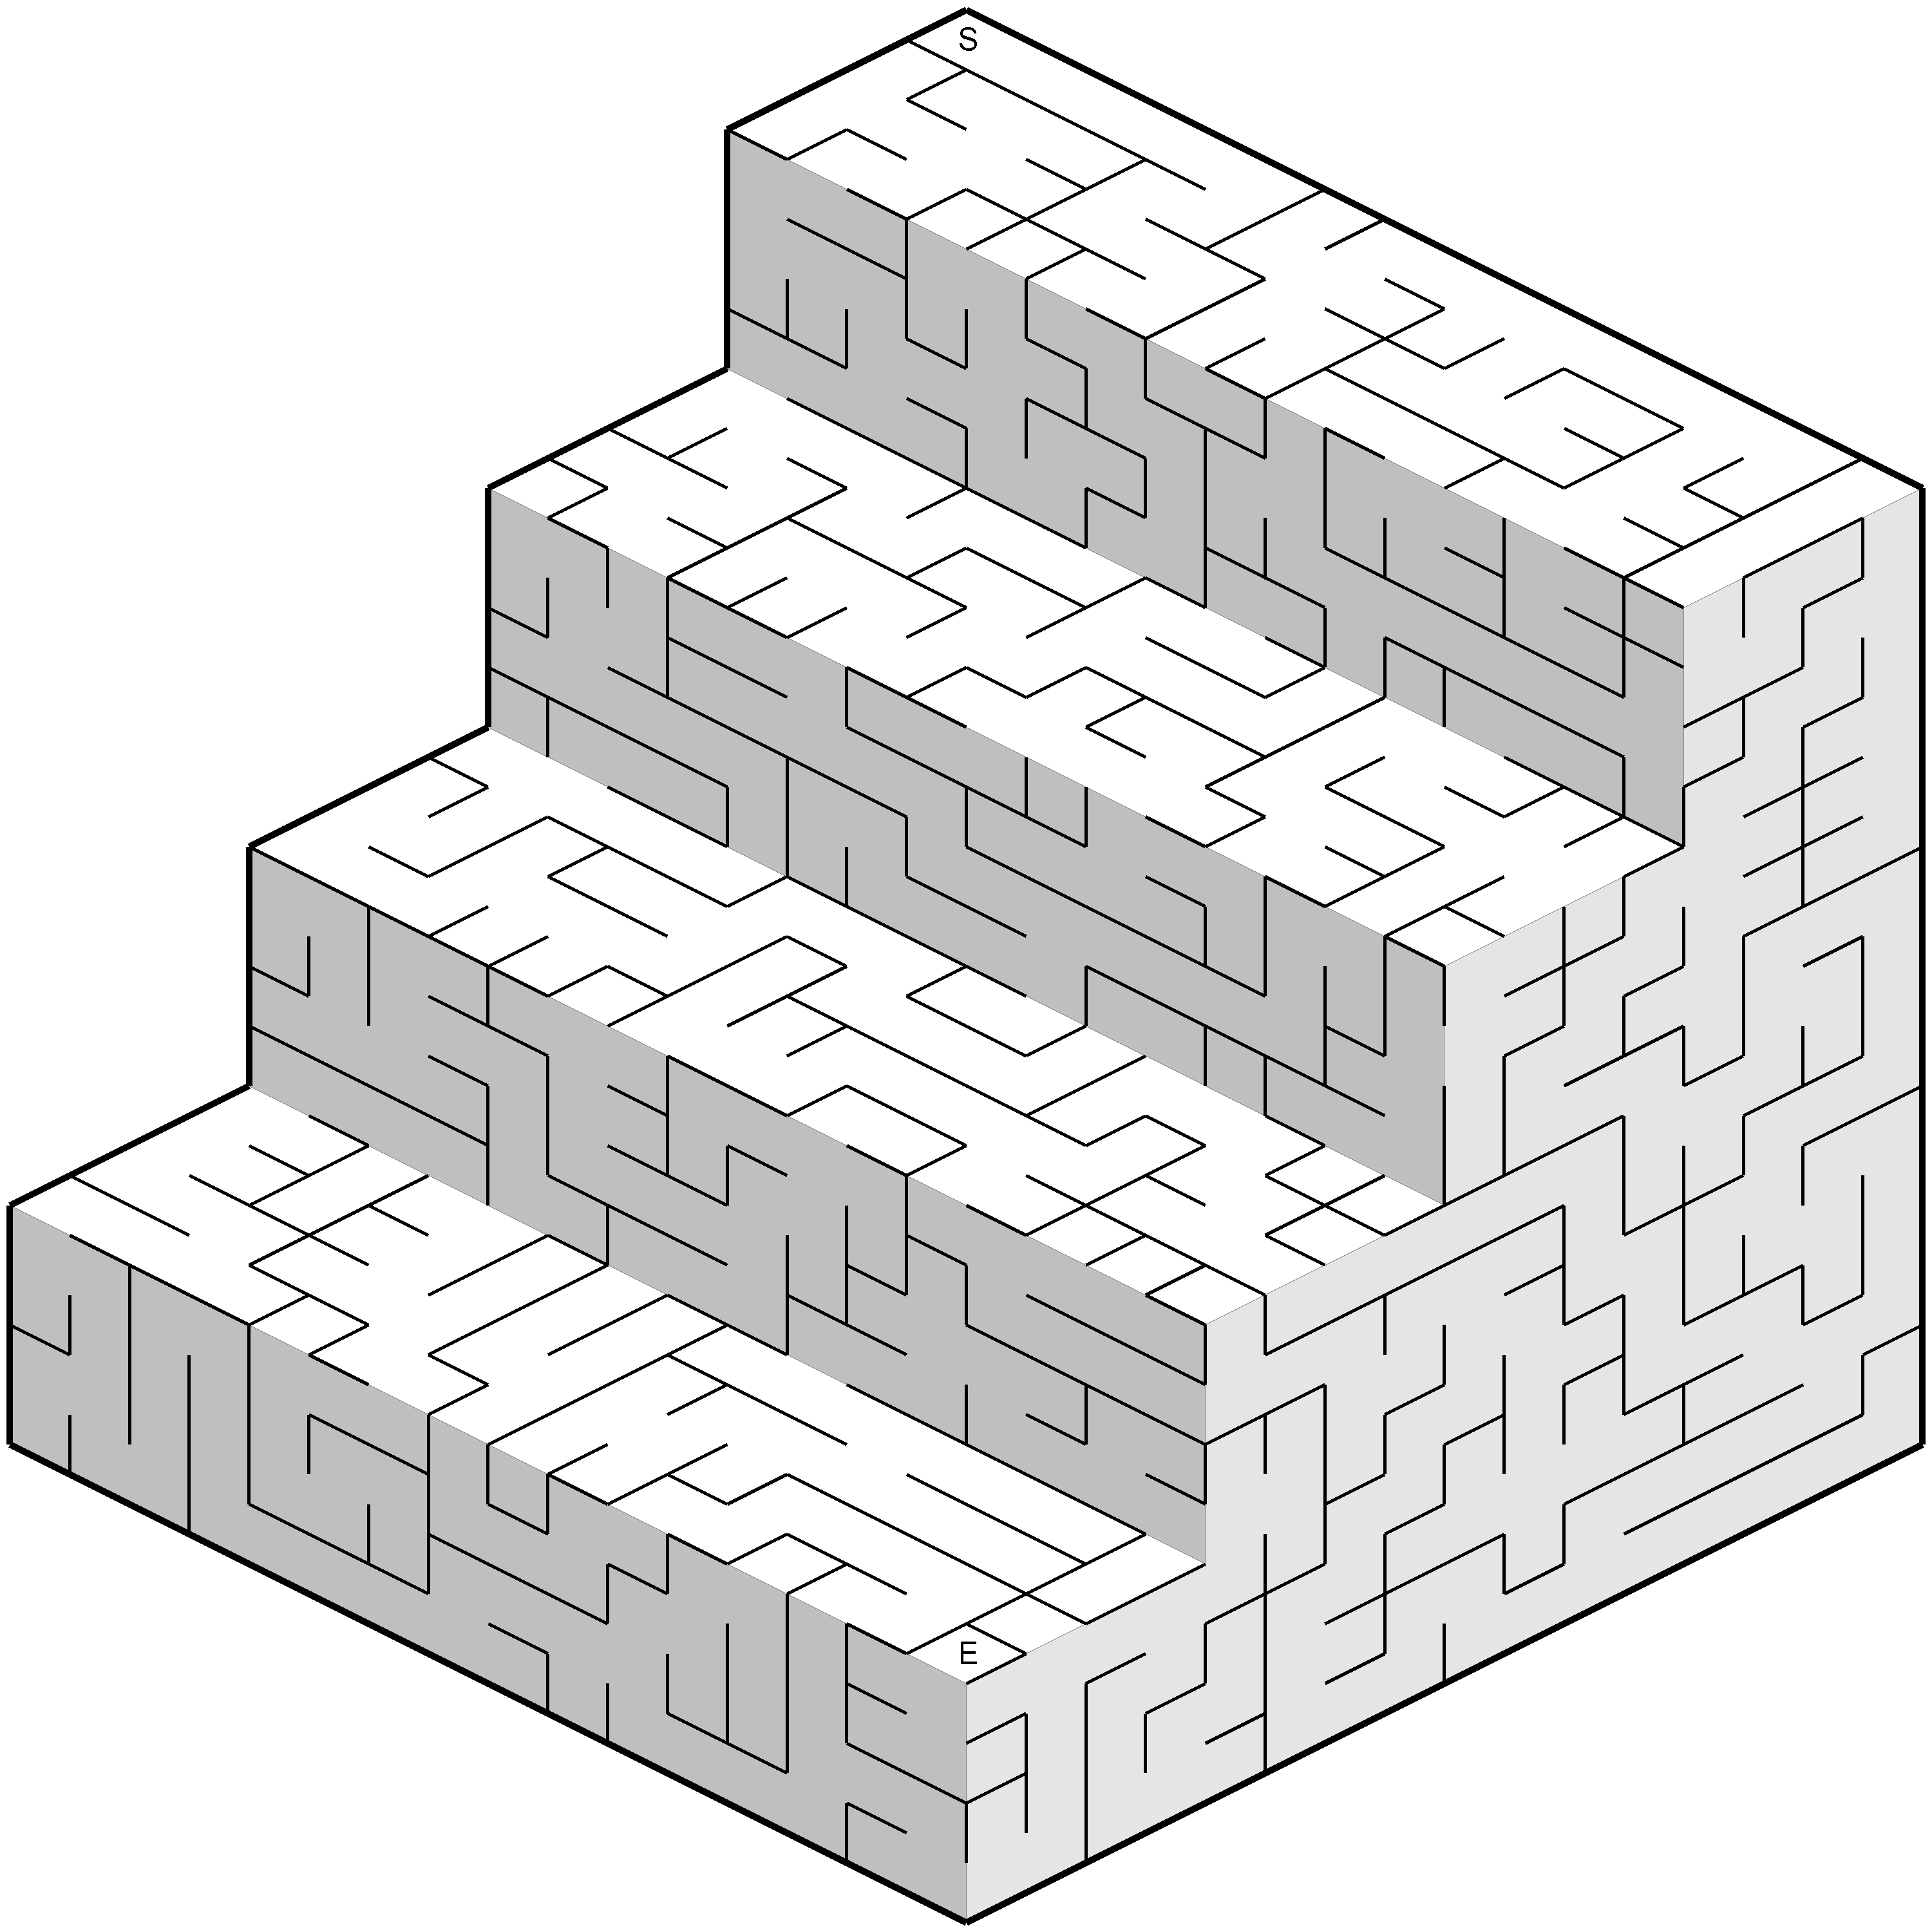
Mazes 3D Isometric Staircase Example
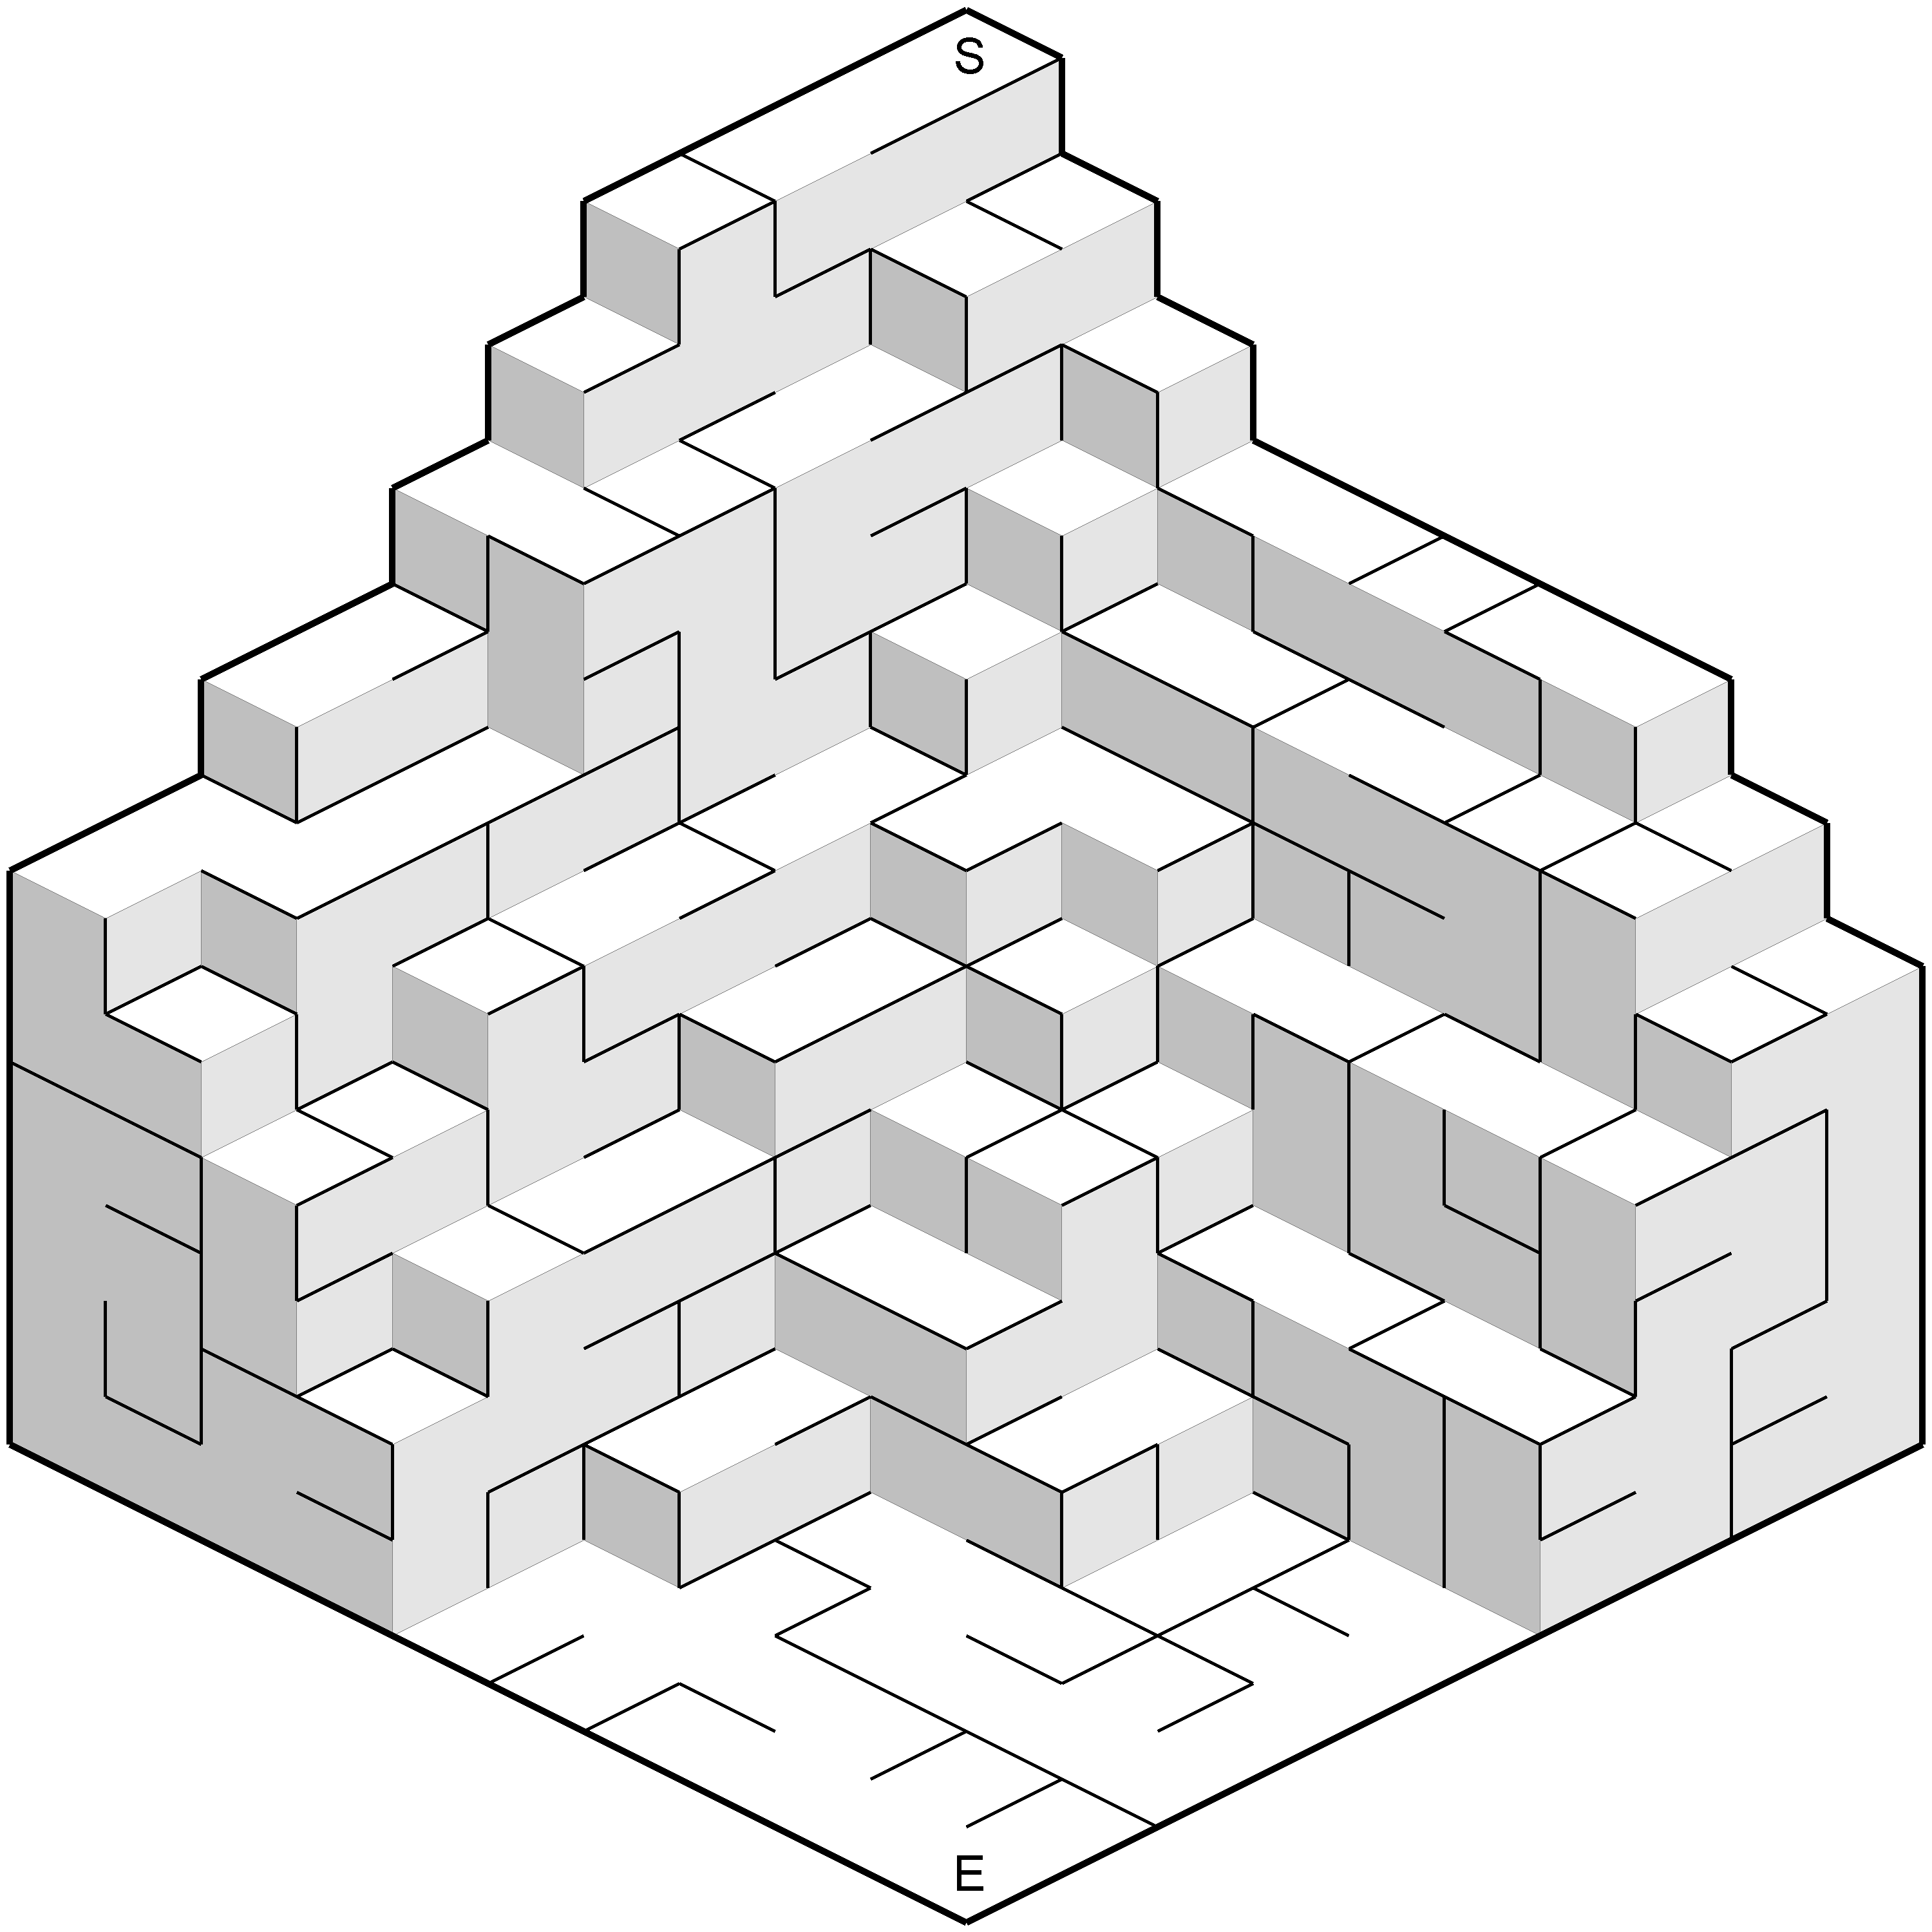
Mazes 3D Isometric Random Example
Style Options for Mazes 3D Isometric
Fill Colors

The Fill Colors are the main surface colors. You can set:
- Canvas (1): The background for your maze. With the 3D Isometric view, there will always be the four corners of the image that are not part of the maze. You can choose a color or set it to transparent
- Cell / Plane colors: there are three colors, for the top plane (2), the right front plane(3) and the left front plane (4)
- For the two ‘vertical’ planes, you can choose to set a fixed color, or to set the color relative to the Top Plane Color. The percentage you enter is calculated in the RGB color space for 24 bit color: Each color (Red, Green and Blue) has a value of 0 to 255. The percentage is take from the maximum value of 255. That means 10% is 25.5. If the top plane has an R (Red) value of 17, a relative value of 10% will set the plane R value to 42.5.
Line Style
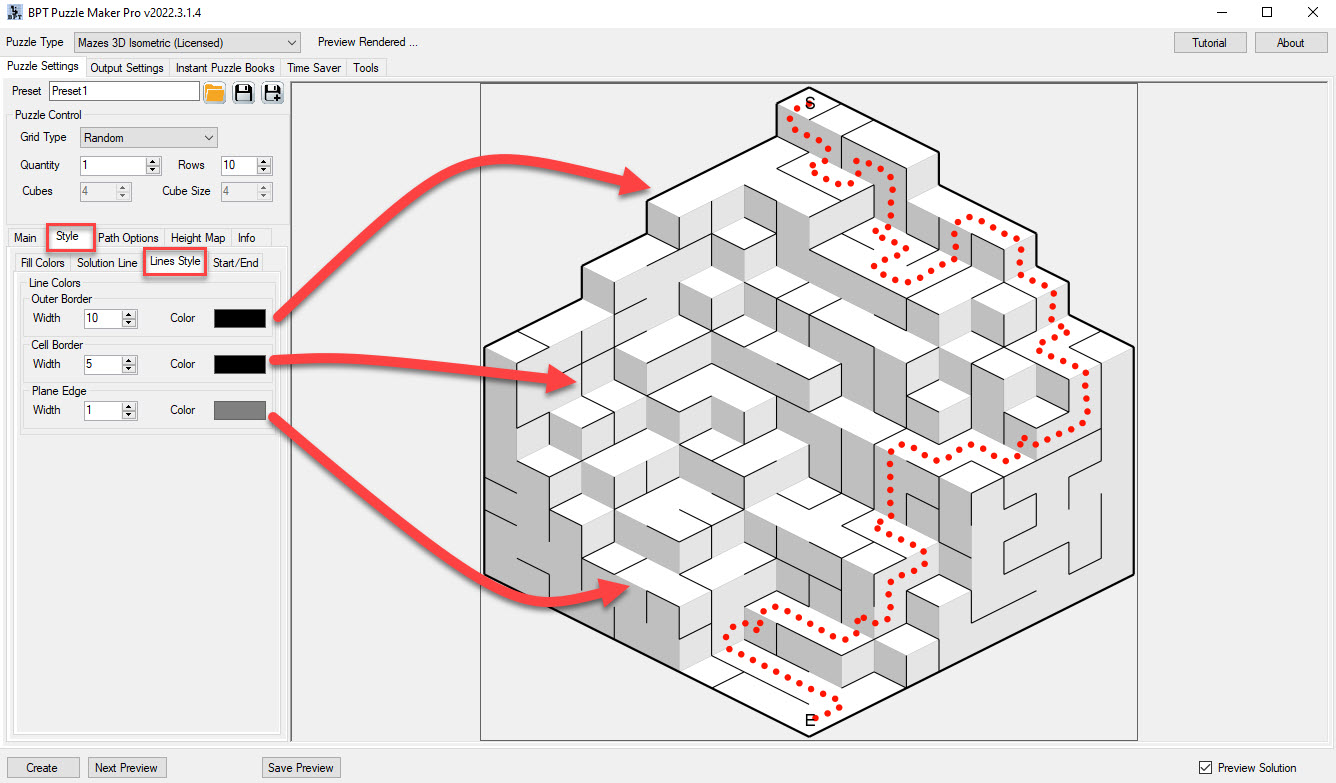
There are three different lines to style, as you can see in the screenshot:
- Outer Border: a border when there’s no maze cell at the other side
- Cell Border: These are in fact the maze lines, indicating which cells are connected, and which paths can be followed
- Plane Edge: The line between the top and vertical planes and between the two vertical planes. Usually this distinction is clear by the cell shading, but it’s here when you need it.
Solution Path Style
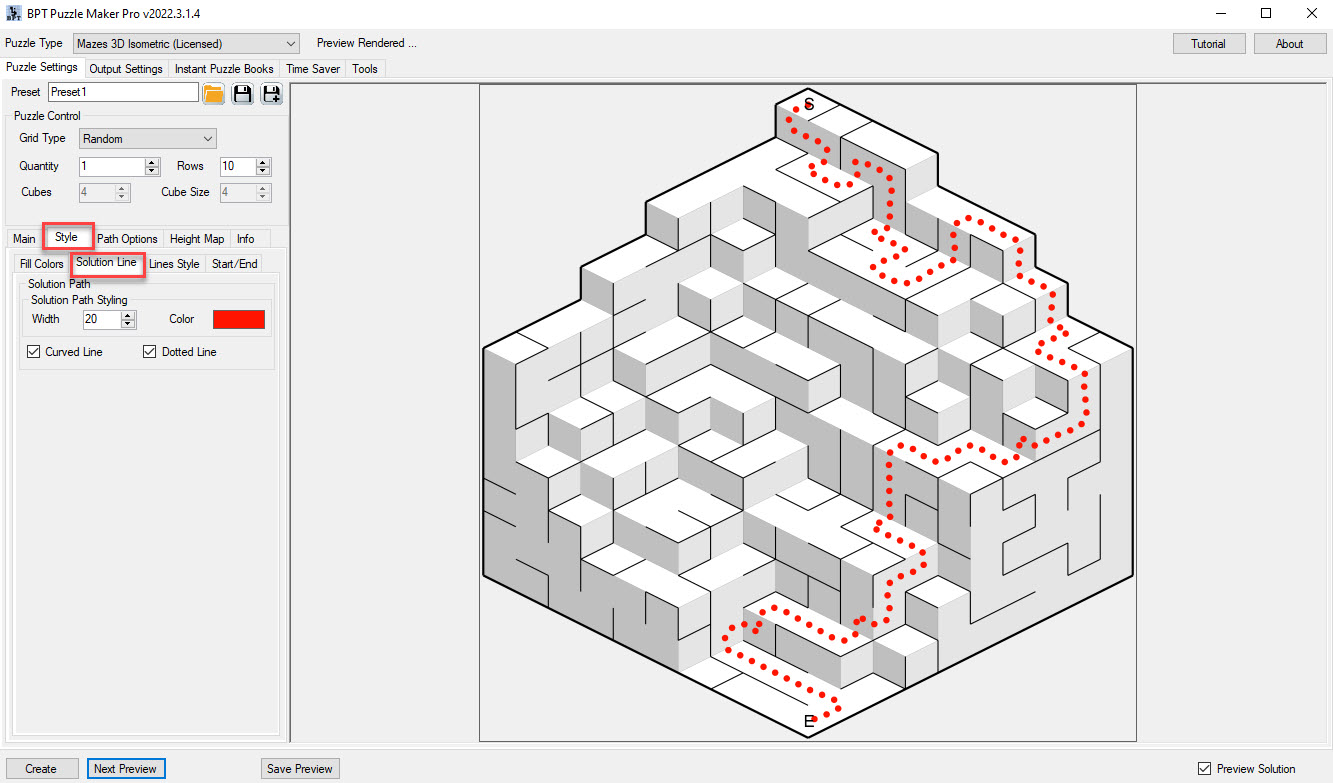
For the Solution Path you can set the width and color, and choose whether the line should be curved and/or dotted.
Start and End Point Style
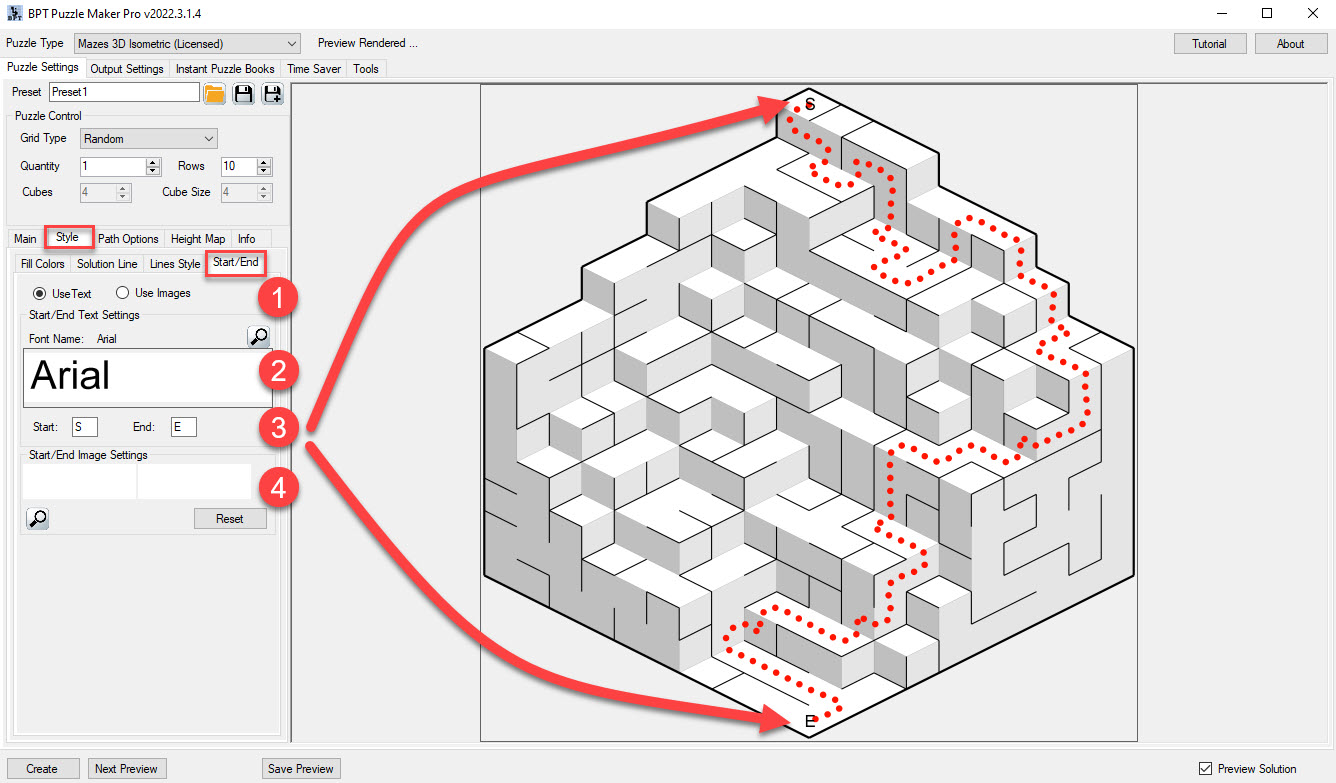
You can choose to use either Text or Images for the Start and End point. By default the text option is used, with the letters S and E for Start and End. You can also use control codes (Alt + number) instead of regular letters.
To use Images, you can either click on the white panels to select an image, or drag and drop an image on it.
Add-Ons
There are three add-ons for Mazes 3D Isometric:
- The Paths Add-on has options to create smaller paths inside the squares (instead of using the entire square / cell as the path)
- The Height Map Add-on lets you create your own 3D Maps, either from scratch, or starting with one of the built-in maps or the random map
- The Time Saver Add-On helps you create your puzzles and puzzle books faster, with advanced layout options for the puzzle books.
You can find more tutorials on the Mazes 3D Isometric tutorials page. Video tutorials can be found in the Mazes 3D Isometric Playlist.